NF1.0 ImportCSV
Feature: Easy Import/Export CSV
Goal: Usability
Functional: Any maintenance/trx window
Sponsor: Trek Global
External Credits: Supported on Super CSV libraries.
Description:
All maintenance and transaction windows have now the ability to import directly data from CSV files.
Rules for CSV Header Format
- Field's Order: The first line of the CSV file must contain the names of the fields to be imported. Please notice that the order of these fields is important since field's defaults and CallOuts are going to be applied in the same way.
- Field's Name: Each column must have a corresponding field's name, this name must be the technical column name on the database (i.e. AD_Org_ID, Name).
- Foreign Fields: When a column is defined in a foreign table then you can import directly the ID, or you can use a Lookup column enclosed in square brackets, for example AD_Org_ID[Value] will look for the Value column in AD_Org table and AD_Org_ID[Name] will check for the table's name in the AD_Org table.
- Customized Fields: The exported CSV columns can differ if the user has a customized grid (see Save Grid Layout) then just the customized columns will be exported, otherwise all editable/displayed columns would be exported excepting AD_Client_ID
- Detail Format Columns: When a tab is exported with its detail, the generated file will use the character ">" to mark a column as a detail, thus every detail tab is going to be exported in this format "Detail_Table_Name>Column_Name"
- Empty Field: If for any reason empty fields comes in the cvs file , the importer will just ignore them.
- Clearing a Field's Value: In case that a value needs to be cleared , the instruction "(null)" can be used to do so.
- NOTE ABOUT (null): if the value is empty then iDempiere will assign the default value of the field if any, if the value is (null) then iDempiere will explicitly set the null value, not the default.
- Key Column's Mark: In all three modes (Insert/Update/Merge) a User is able to mark its own key in order to make every row described in the CSV file unique, this can be done by marking a column's name with /K at the end, please notice that "/K" must be written in capital letter.The main purpose of this design is to give freedom to end-user to define its own keys depending on its business case.
Check NF3.0_CSV_Importer_Single_Transaction if you want to set up your header to support single transactions
CSV Format Supported
This current version supports the following CSV parameters:
- Quote Char: Comma ( , )
- Delimiter Char: Double quote ( " )
Address Rule
There is an exception with the character ">" since it is commonly used by the exporter to mark a column as a detail, but when a tab contains an address field then the exporter separates such field into its 11 attributes and add these ones after the last field of the tab: Address1,Address2,Address3,Address4,City,C_City_ID[Name],Postal,Postal_Add,C_Region_ID[Name],RegionName,C_Country_ID[Name]
*Table_Tab_Name>C_Location>location_attribute
The following example shows how the CSV file from Warehouse window would look like (Empty location columns were drop for this example) Warehouse Address Example
Exporter
The easiest way to create a CSV import file is using the export CSV button that creates a template with the required columns to import, there are two ways to export templates which are:
Exporting One tab to CSV
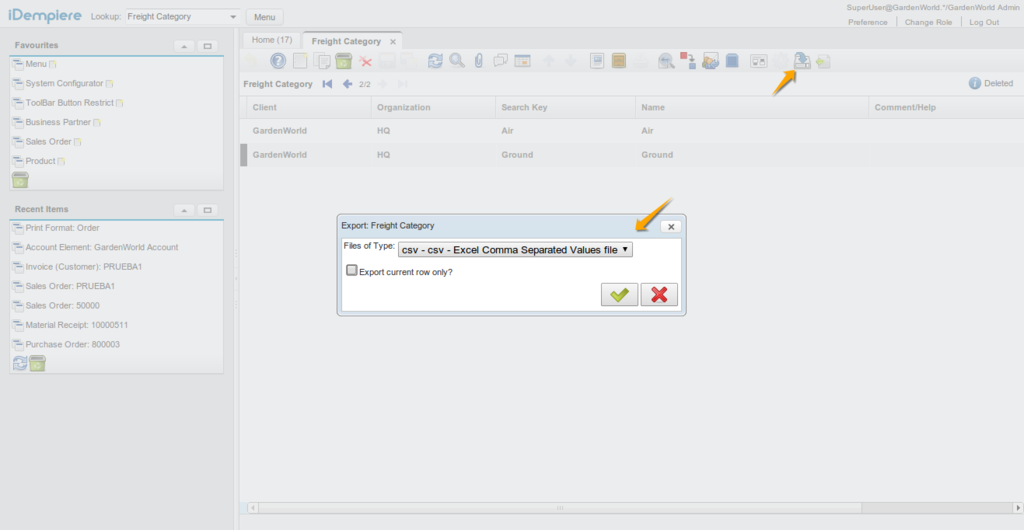
In this example just one tab is exported, take a look at the following screenshot to generate a CSV file on the window "Freight Category" :
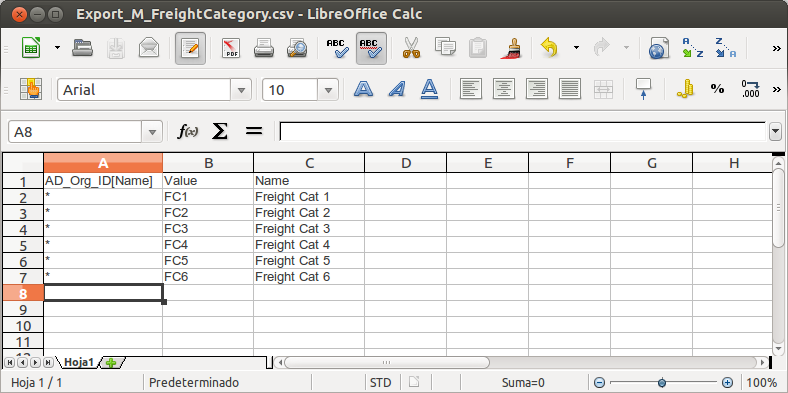
Below you can see the generated CSV, in this case the generated file was modified to drop some unneeded columns and the necessaries ones were kept in order to insert 6 new rows of freight category records (The CSV Header and generated columns is explained below):
Exporting Parent-Detail tabs to CSV
In this case, the generated file belongs to a master-detail structure; below the example shows a sales order with three lines , in which from A to G column is described the information of the parent Tab "Order", and from H column and on is described the detail tab "Order Line":
Currently there are some restrictions to take into account when exporting a master-detail structure , these are :
* Just One detail tab is going to be exported per master record, in case that more than one detail tab needs to be imported, the CSV file will have to be modified manually by adding the desired columns and
  following the structure explained above "Detail_table_name>Detail_Column_Name".
* Tabs with level higher than 1 are not going to be exported as a parent-detail structure.
  i.e. The window "Country, Region and City" has 3 levels of depth, as a consequence the exporter is going to export records for Country and regions but not for cities. In case that the city tab needs to be
  exported, Idempiere is able to do so by exporting it as a single tab
Importer
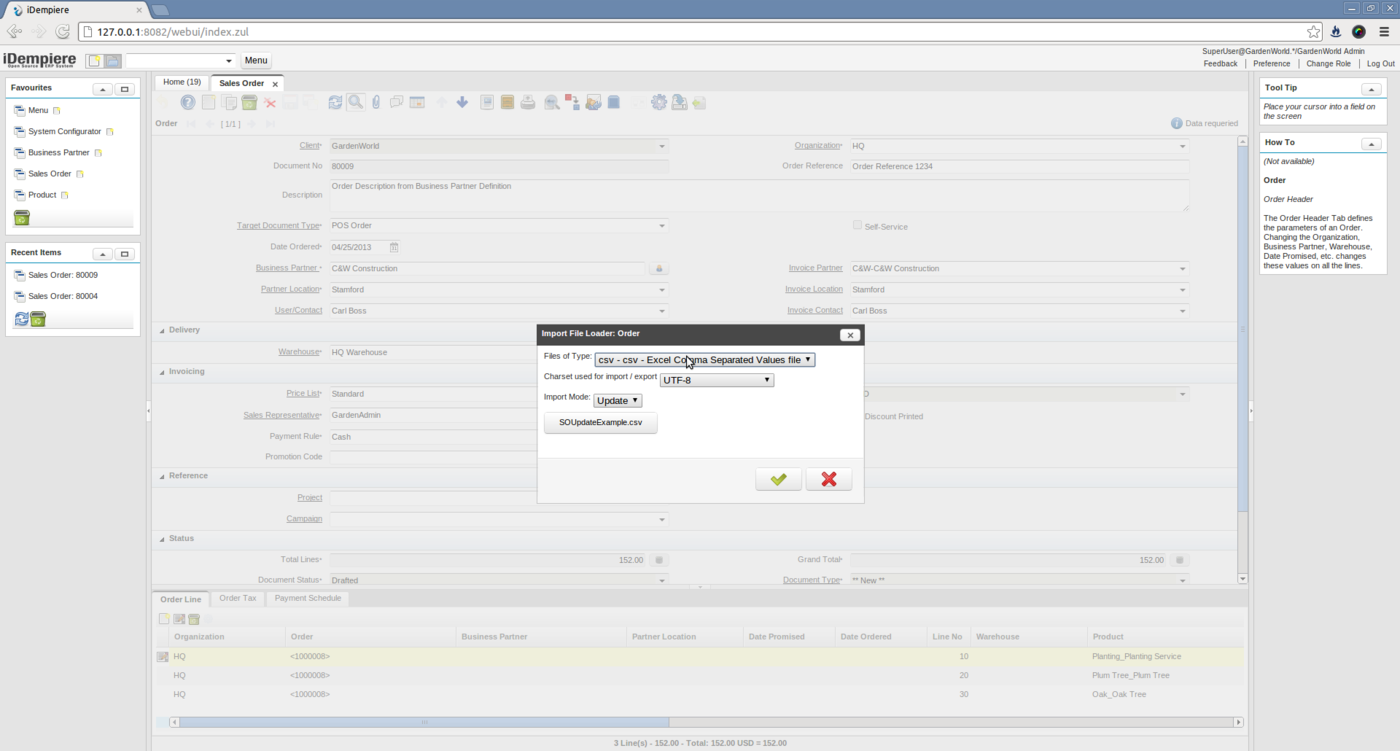
Once a CSV file is already configured, you just need to click on the Import button, select the character set , the import mode(explained below) and the file to import and then push the OK button.
It is important to highlight that a transaction management per master key has been implemented for all three modes, this was aiming to make any operation in the importer atomic and consistent, as a consequence if a parent-detail CSV file is imported and one of its detail fails for any reason, the whole record (Parent and detail) will be rolled-back and importer will inform the reason in the column "_LOG_".
Insert
In this mode the importer is able to insert as many records as described in the CSV file as well as it is able to insert in more than one tab. Please keep in mind that the importer is going to check all mandatory fields out.
Importing Just one Tab
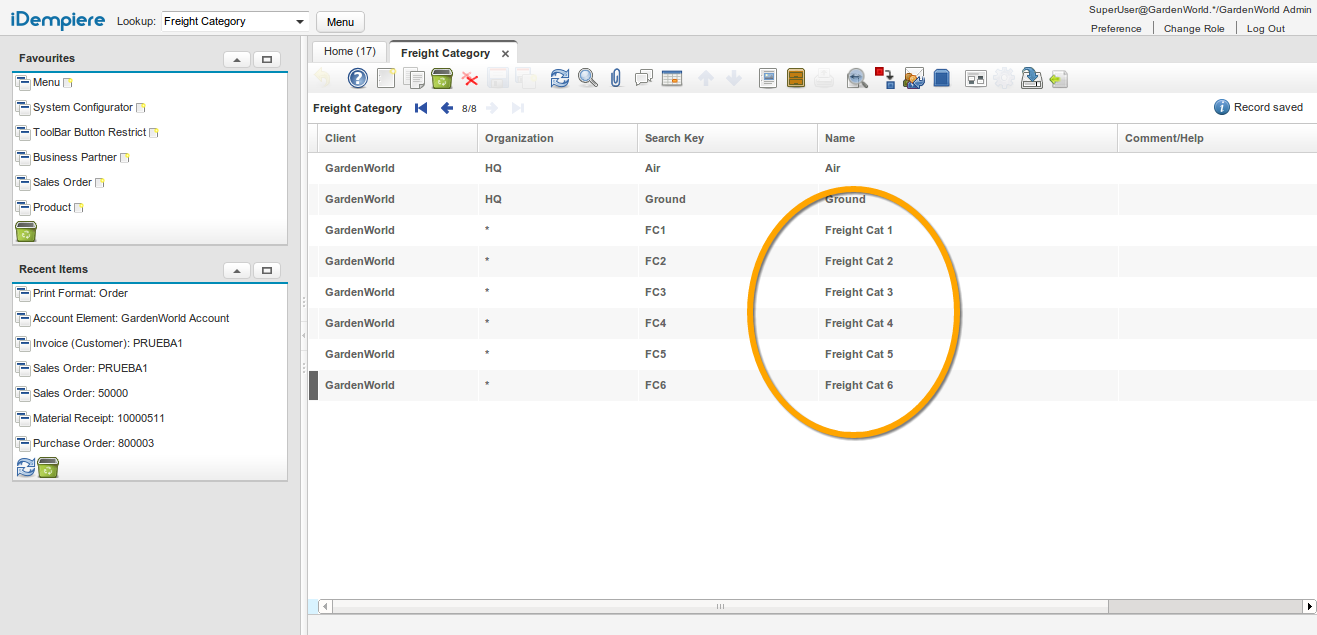
The file will be pre-processed and processed (process explained below) and when successful you'll see the new records on your window:
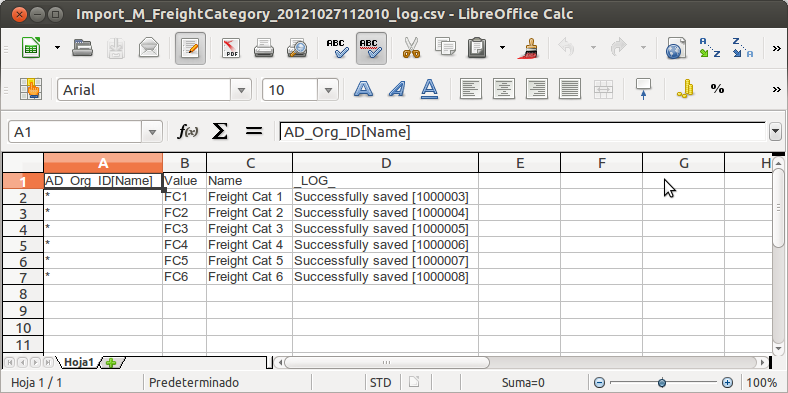
You'll be asked also to save a log file (when successful) or an error file (when pre-processing errors are found), the log file looks like this:
Importing Parent-Detail Tabs
In this example a sales orders with 3 lines is created, here is available the CSV used in this example Sales Order Insert Example
As can be seen, at the time when the order is imported, it is impossible to know what "DocumentNo" is going to be generated, but this is not a problem since the importer will fill such value for both header and line. As soon as the importer finished successfully it will inform us in the last column what was the result with the column "_LOG_": Sales Order Insert Log
CORRECT SALES ORDER CSV
- The above is wrong due to repeating Parent values such as Orderline>AD_Org_ID and OrderLine>M_Warehouse_ID. Correct CSV is shown below.
Update
This mode will update just existing records, hence at least one key column must be specified for each described Tab (Parent or Detail) in the header record, otherwise the process will be stopped and an exception will be thrown on the screen with this message "There must be key columns in order to update or merge record(s)".
The CSV File created earlier "Sales Order Insert Example", can be taken to update any editable field for the order, the only thing you have to do is to add the column "DocumentNo/K" with the generated sequence (In my case was 80009) in the header and mark the product field as a key column "C_OrderLine>M_Product_ID[Value]/K". With this example the "Description" and "Payment Rule" fields will be changed in the Order as well as the "Entered Qty" and "Description" for every order Line Sales Order Update Example
Merge
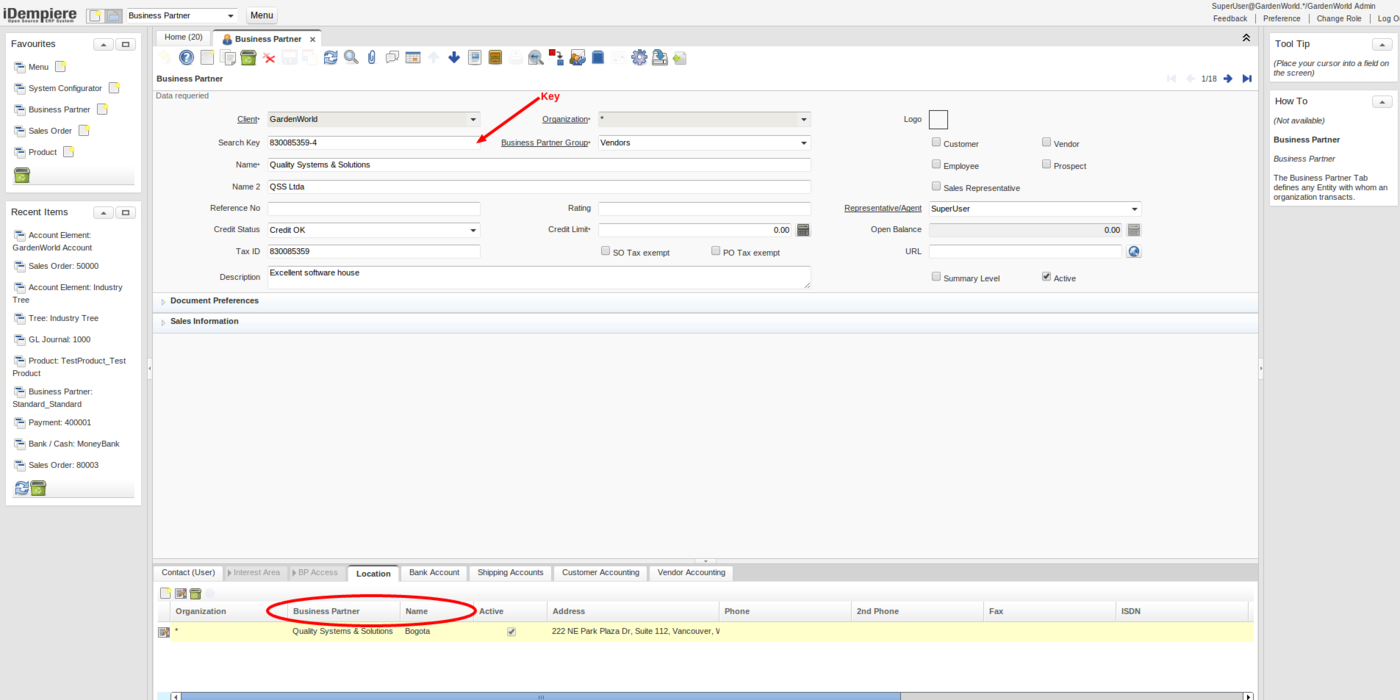
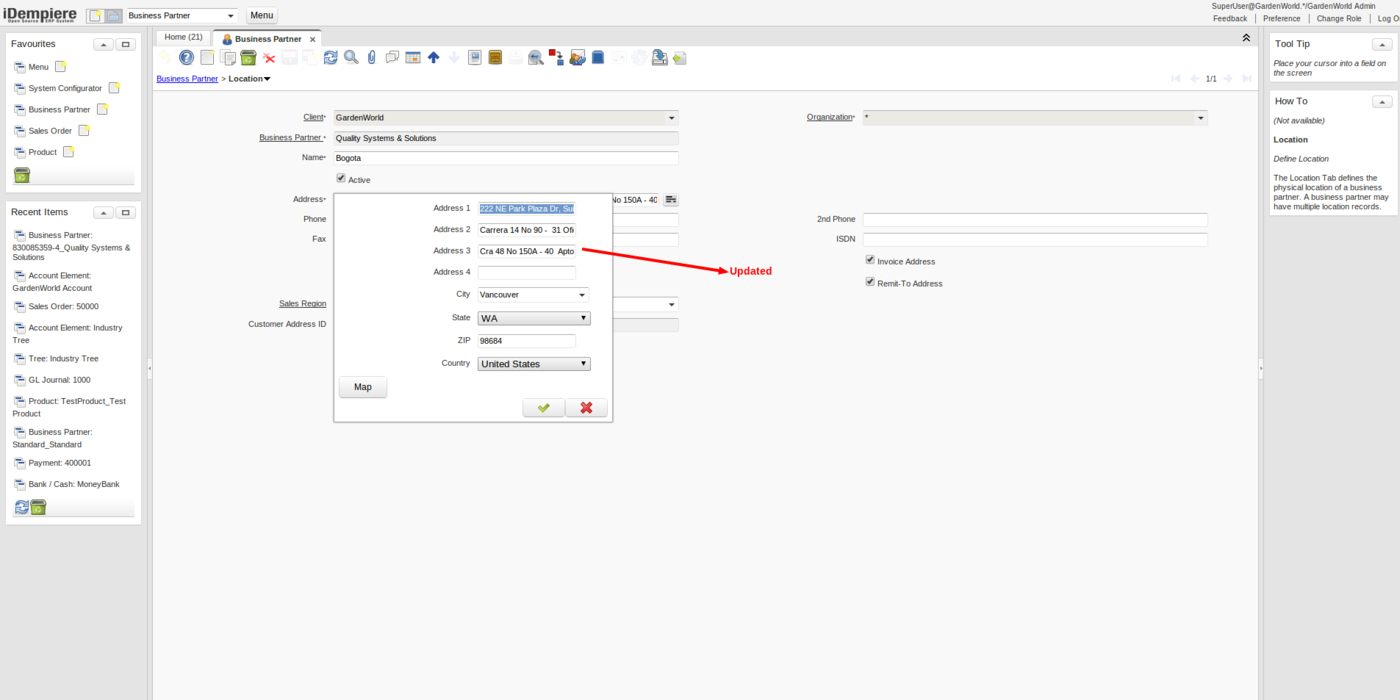
With this mode the importer will update every record if the defined key(s) exist (At least one key column per tab is mandatory ), otherwise a new record will be inserted. Below a new Business Partner is going to be inserted with one Contact and one Location; do not forget to define the key(s) columns, in this case these are:
 * Business partner Tab: "Value/K"
 * Location Tab        : "C_BPartner_Location>C_BPartner_ID[Value]/K" and "C_BPartner_Location>Name/K"
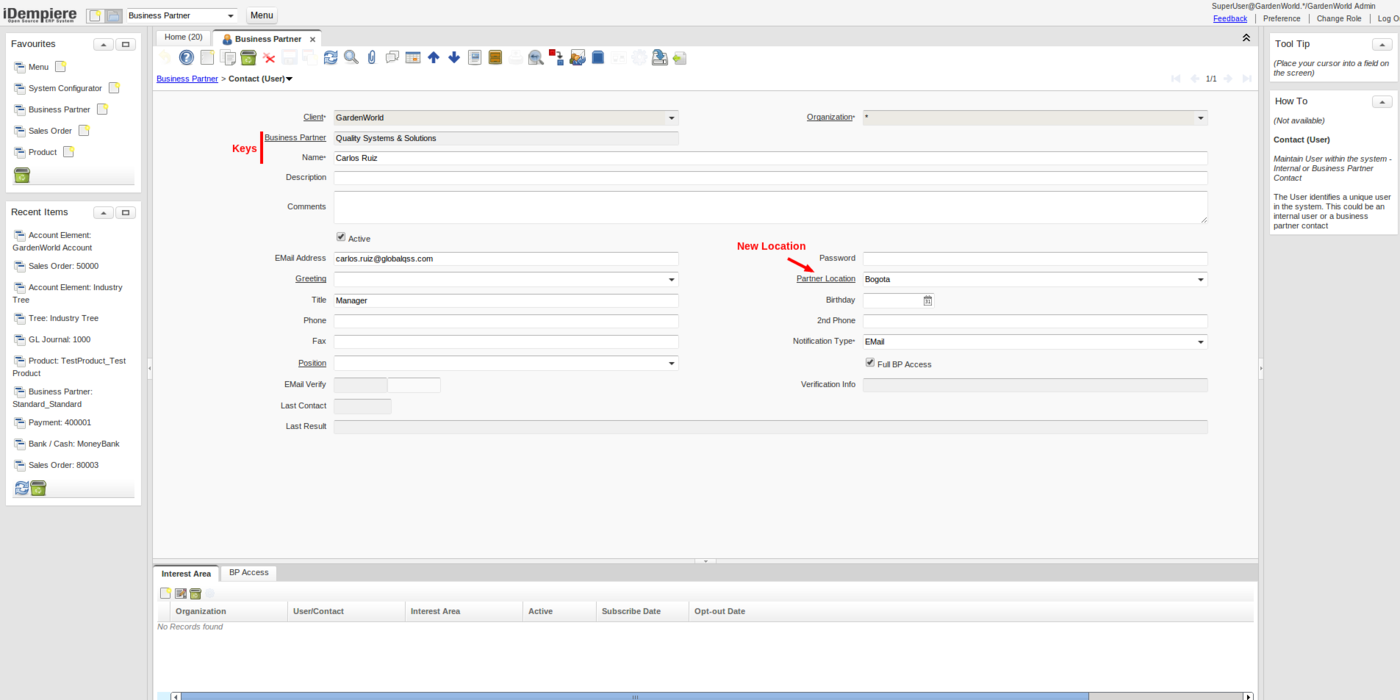
 * Contact Tab         : "AD_User>C_BPartner_ID[Value]/K" and "AD_User>Name/K"
Example CSV : Business Partner Merge - First Example
This is the new Business Partner "Quality Systems & Solutions" with location in "Bogota" and contact "Carlos Ruiz"
Business Partner Merge Log - First Example
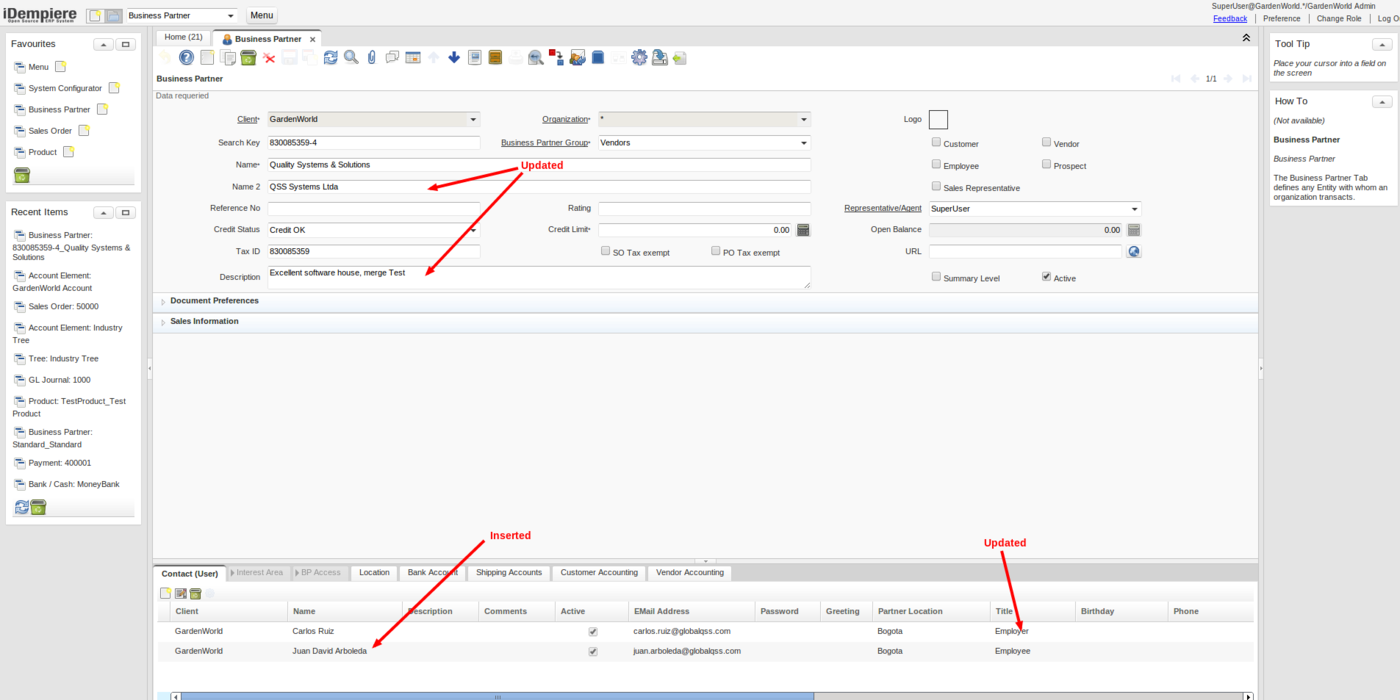
Now let's proceed with another example using the same Business partner and the same keys, but this time some records are going to be updated and another is going to be inserted Business Partner Merge- Second Example:
- To Update
- Business partner Tab: "Name2" and "Description"
- Location Tab : "Address2" and "Address3"
- Contact Tab : "Title"
- To Insert
- Contact Tab : New contact "Juan David Arboleda" with location "Bogota"
Business Partner Merge Log - Second Example
Document Action
Any document can be processed through a valid document action(please notice that the Document Action will depend on the Document Status), this can be done by adding a column into the header named "DocAction" and describing the action to do :
- Complete
- Wait Complete
- Approve
- Reject
- Post
- Void
- Close
- Reverse - Correct
- Reverse - Accrual
- ReActivate
- Prepare
- Unlock
- Invalidate
- ReOpen
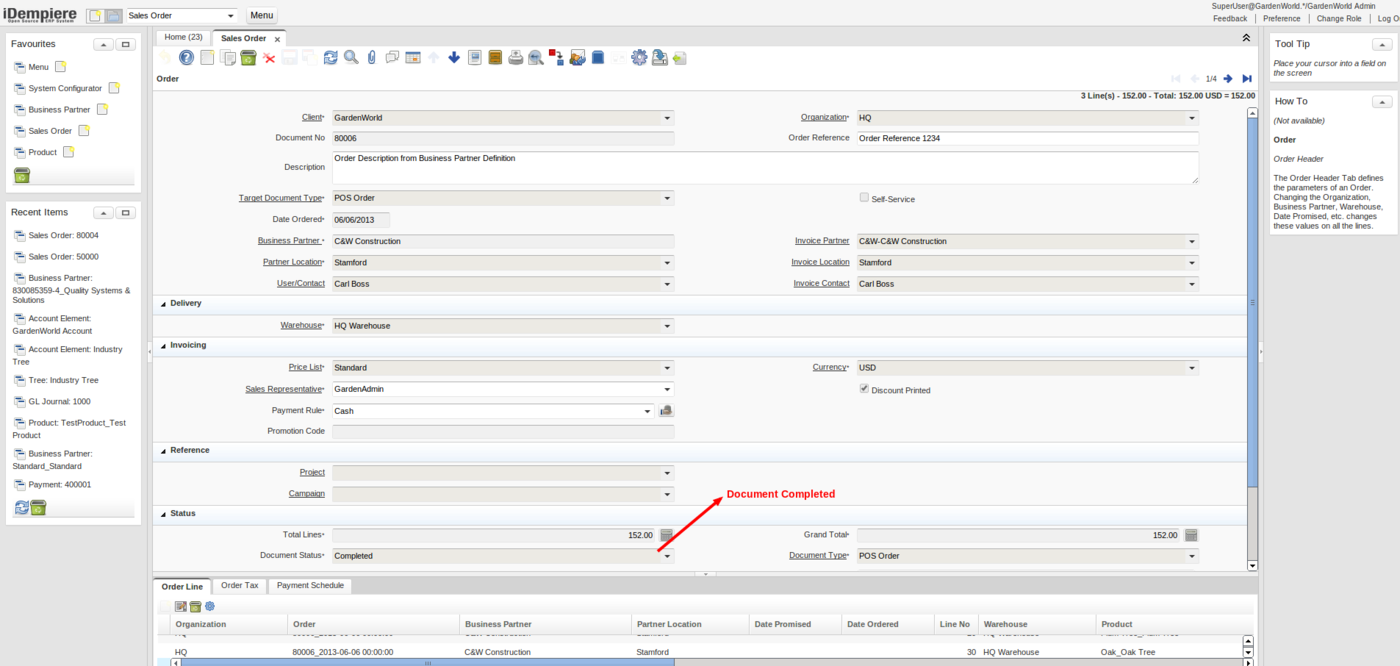
Let's create a new Sales Order with three Lines in Insert mode and at the same time complete it.
Document Action in Sales Order
Process Description
- Create a CSV file with the proper header and detail tabs(explained below).
- Open your window and navigate to the tab that you want to import
- Push the Import button and fill the required parameters:
- Choose file type (at this moment just CSV is supported)
- Define the character set of your input file
- Choose the import mode: Insert , Update , Merge.
- Choose your CSV file
- Push the OK button
- Initially a basic CSV pre-processing is done to check for:
- Header validation:
- Proper headers
- Mandatory fields
- Check the fields being imported are editable and displayed
- Data validation:
- Proper data types
- Foreign key resolution (i.e. based on Value or Name columns of foreign tables)
- if there are location fields,thus the country must exist and region and city are optional but valid values.
- Header validation:
- When any of the validations fails then an _err file is written and the user is asked to save it
- The user is intended to open the CSV _err file, fix the errors, drop the last column (tagged as _ERROR_) and re-import the file
- When all the pre-validations pass, then the import process start creating records on the tab
- NOTE this is done using the window logic, so, defaults and callouts are applied - the order of the fields being imported is important
- When saving a record:
- If the saving is successful then a _LOG_ message is written in the _log file
- If the saving triggers any error then an error message is written in the _log file
- The user is asked to save a _log file for review
How to disable this functionality per role and/or window?
You can disable the export and import buttons per role and/or window using the functionality Restrict Toolbar Buttons
Hints & Tricks
You can not use the resultset of a joined SQL query for importing. Such a query may contain a record of the main table in more than one rows for every entry of a subtable (e.g.: For a business partner with two locations there are two rows and each one has the fields for c_bpartner filled with the exact same values). This is not allowed. You can circumvent that by using not "import" but "merge" as a process parameter.
To "merge" a table which has subtables you do not only have to mark the keycolumn of the main table with "/K" but also the key columns of the subtables. You can choose more than one of them (as a joint primary key). So you should mark both the column that connects to your main record and the value or name column of the subrecord with "/K".
Known Issues
- to start an import operation you must be located at an unprocessed document, if you are positioned at a processed (completed) order then the import cannot work
- in some cases after the import you must close and reopen the window to be able to query other orders
Comments
active column should be treat special
Some warning about AccessNotDeleteable ReadOnlyRecord
Check Talk:NF1.0_ImportCSV
Technical Info
Technical Info: IDEMPIERE-454


