Developing Plug-Ins - 2Pack - Pack In/Out
This tutorial is brought to you by Jan Thielemann from evenos GmbH (www.evenos-consulting.de). If you have questions, criticism or improvement suggestions, feel free to visit me (Jan.thielemann) or write me an email
Goal of this tutorial
The goal of this tutorial is to show you how you can use the pack in and out functionality of iDempiere to transfere changes like new windows or processes from one system to another. Also you can use the 2Pack functionality to automatically create stuff when your plug-ins are started for the first time.
Prerequisites
Before you start this tutorial, you should take a look at the follwing tutorials:
Also you should be able to create a new plug-in by yourself because i won't explain it in this tutorial.
tl;dr
https://www.youtube.com/watch?v=jykimSDE_54
The workflow
Pack Out data
The 2Pack functionality in iDempiere is very powerful. In older versions of ADempiere, when you created a new functionality, you also had to log the migration scripts so that you got SQL files which then would create new tables for example. In iDempiere, you just create your tabels and so on and then use the Pack Out feature to create a zip file. This file can then be packed in on another system and it will create all the stuff you packed out previously automatically for you. In this section, i want to show you what you can pack out, how you do it and how you can manage different versions of your pack outs.
Managing your Pack Outs
Before we start creating entries in the Pack Out window, you have to make sure what you want to pack out. If you want to pack out new tables, processes and other system relevant stuff, you need to log in with the System Administrator role on the System client. If you want to pack out specific data of a table, you can do this from the client to which the data belongs. This is important because you only can pack out data from the client you are logged into.
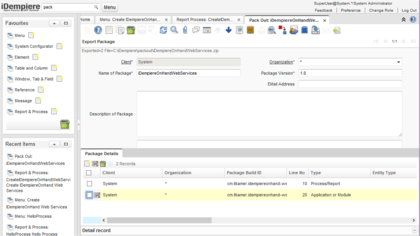
When you chosed the right client for you, you can open the Pack Out window which is located in Application Dictionary > Application Packaging > Pack Out. Here you simply create a new entry. I like to chose my plug-ins name for the Name of the Package and for my plug-ins, i like to use my reverse domain identifiert followed by the plug-ins name (e. g. org.evenos.broadcaster).
For the Package Version, you should use the same version number you gave your plug-in in the MANIFEST.MF. If you don't want to use the packin to automatically pack in changes when your plug-in is started for the first time, you can chose whatever version makes sense to you. 2Pack can use the version to determine if a 2Pack is already installed. So if you make changes to your Pack Out, e. g. add another table, make sure you increment the version number of the Pack Out entry.
In the Description of the Package and Instructions fields, you can provide additional information about this Pack Out. Once you created the 2Pack zip file, there will be a file called PackOut.xml in the dict folder. In this XML file, you can see the information you entered in the field mentioned above.
The Date From field is for filtering. If you set it, the Pack Out process will only use entries newer than the entered date. The Export Dictionary Entity is used to also export entries with the Entity Type D which stands for Dictionary. These entries are normaly not changed by administrators or developers but by iDempiere itself. If you make custom changes you should always use another type than Dictionary, for example User Maintained or a custom one.
Finally theres the Export Package button which creates the zip file for you. But before you hit it, you need to add some more information. In this case, Package Details
What can be packed out
Talking about Package Details, heres a short list of things you can pack out in iDempiere:
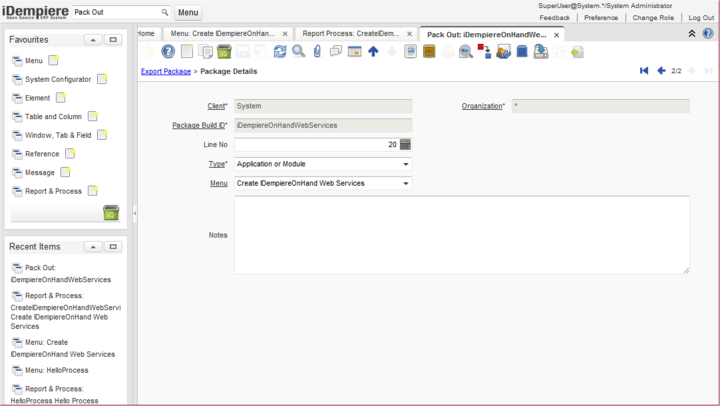
- Application or Module - this type will pack out a whole module. You simply chose an entry from the menu - which also can be a summary level entrie - and the 2Pack will contain everything needed for this module like the menu entries, the windows/processes/reports, tables and columns
- Code Snipit - a custom piece of code which can be stored in a file on the filesystem
- Data - maybe the most powerful type because it lets you pack out stuff from any table with SQL. So even if you want to pack out something which has no own type, you can still use the data type to pack it out
- Dynamic Validation Rule - as the name says, this type packs out Dynamic Validations
- Entity Type - as the name says, this type packs out Entity Types
- File - lets you pack out a specific file from the file system. Useful if you store images for reports in your servers data directory for example
- Form - pack out a Form
- Import Format - pack out a Import Format. Make sure you are on the right client
- Message - pack out a (translated) message
- Model Validator - pack out a Model Validator. This is not used often anymore since we now can have Model Validators in the OSGi way so we don't need to modify the AD anymore
- PrintFormat - pack out a PrintFormat. Make sure you are on the right client since System cannot pack out entries from GardenWorld
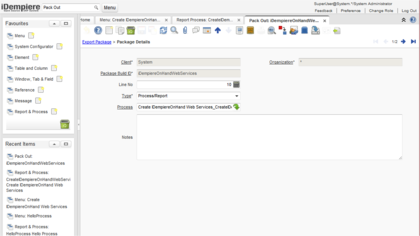
- Process/Report - pack out a Report or a Process. Notice that the menu entries are not packed out
- Reference - pack out a Reference from the Reference window. Useful if you have new datatypes, or List/Table Validations
- ReportView - lets you pack out a ReportView
- Role - with this type, you can pack out a Role
- SQL Statement - this type can be used to execute a SQL statement. You can also chose to only execute it in special database systems
- Table - packs out a given table
- Window - packs out a given window. If the table for this window does not exists or if columns are newly created, these will get packed out too
- Workflow - packs out a whole Workflow
This list is the default list for iDempiere at the time of writing this article. Of course you can add additional types by yourself. If you want to do this, you also have to create new PIPOHandlers. To do this, take a look at the org.adempiere.pipo.handlers bundle in the workspace. Here you have to add a handler for your case and make sure you also add it to the MANIFEST.MF in the extension tab. Also you need to add your new type in the X_AD_Package_Exp_Detail.java. In MPackageExpDetail, you may want to add another elseif in getExpRecordId() and also make sure that in PackOutProcess.java you return the right name in getTypeName(). The name you return here must fit the name you entered in the MANIFEST.MF! If you done it right, the Pack Out process should find your element handler. If you do this for the first time, take a look at all the other element handlers. It is even possible to nest handlers. A good example is the Application or Module handler which nests Windows, Tabs, Fields, Tables, Columns and other stuff.
Packing stuff out
via Pack Out window
Once you know what you want to pack out, you can start creating Package Details. Just add an entry, select the type and fill in the fields. Lets do this together with the data-type since this can be seen as the most powerful type. We start by adding a new entry and chosing Data as the Type. Then we have to select a table. Lets just chose AD_Package_Exp and pack out the pack out. Then enter a SQL statement to select the entries you want to pack out:
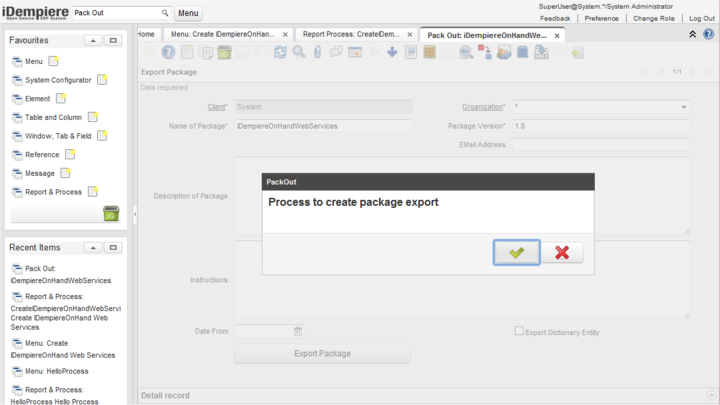
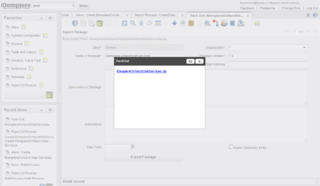
Then go back to the Export Package tab and hit the export button. iDempiere will provide you a download link for the 2Pack.zip if you are using the WebUI. Also you can find the zip file in the packout directory in your iDempiere home directory. Notice that the zip file is named like the Pack Out entry you created.
Thats all you have to do to pack out stuff on iDempiere. Quiet easy, isn't it?
via Table
Did you know that you not only can pack out stuff via the Pack Out window? It is also possible to pack out data from a table directly from the window of this table. Imagine the Pack Out window as a universal tool which can pack out everything. But if you only want to transfer e. g. a Product from one system to another, theres an even easier way to do this. Just open a window of your choice and hit the export button in the toolbar. A popup will open where you can chose 2Pack as the type. It also lets you chose to export all entries in this window or only the current row you have selected. Hit the OK button and the 2Pack.zip will be created for you. If you do this for example on the Product' window, the 2Pack will contain the product, translations, accounting information and costs.
As easy as packing out entries from windows is, packing in is not available on window level yet. You still have to create a Pack In entry, which we will do in the next section.
Pack In data manually
I found out that i nearly never use the manual pack in. When i do, it's during the development. The reason is that i like to develop a plug-in and put a 2Pack.zip in it so that iDempiere does the pack in for me. However, for the sake of completeness and since you may just want to transfer products from one system to another heres how you pack in stuff manually.
Install a 2Pack
First, you need to open the Pack In window and create a new entry. Provide a Name and save the entry. Now hit the Attachment button and attach your zip file to this entry.
Then hit the PackIn button and let iDempiere do the rest. But make sure you are on the correct client because you cannot pack in System stuff in GardenWorld!
By the way, the window Packages Installed gives you an overview over what 2Packs are installed in the system as well as when they were installed. Also theres this other interesting window calles Package Maintenance which we will talk about in the next section.
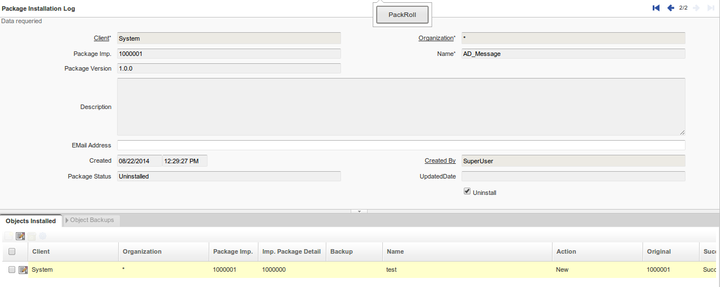
Rollback a 2Pack
Maybe you are not satisfied with the changes a 2Pack brought with it. For this purpose, there is a rollback functionality. Open the window Package Maintenance. Here you can see the installed packages and which objects were installed within each package. Use the Process toolbar button to start the PackRoll process which makes a rollback. Here for example i packed in a Message. Once i executed the rollback process, the message was still in the AD but it was deactivated. I noticed that the Data type doesn't create entries in the Objects Installed tab so i think this depends on how the element handler for this type is programmed.
Pack In data automatically
Now that we know how to make a manual Pack In, lets talk about the more advanced features of iDempiere: the automatic pack in of 2Packs in your plug-in. There are two different ways you can use. I will explain both to you now.
2Pack with AdempiereActivator
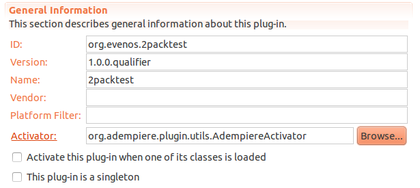
This first way, which is also older and often tested, is to use a AdempiereActivator in your plug-in. To do this, open your plug-ins MANIFEST.MF and chose AdempiereActivator as the Activator in your manifests Overview tab. If you can't find the activator, you may have forgotten to add org.adempiere.plugin.utils to your dependencies.
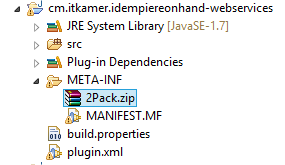
The next thing you have to do is to locate your 2Pack zip file. Copy this file to your plug-ins META-INF folder and rename it to "2Pack.zip". This is necessary because otherwise, the activator will not find your 2Pack.
That's it. Isn't this easy? Now the only thing left to do is to activate your plug-in and iDempiere will automatically pack in your 2Pack if it is not already done. But theres also a tricky part here. If you update your plug-in, you have to make sure that you also update it's version number. The same goes for the 2Pack. If you make changes to the Pack Out, increment the version number and export it again. iDempiere will only pack your zip file in if theres not yet a 2Pack with your identifier or if the version of your 2Pack is newer than the installed one. A more advanced Activator is the Incremental2PackActivator which we will talk about next.
2Pack with Incremental2PackActivator
AdempiereActivators greatest weakness is that is can only handle one zip file. So if you make changes, you always have to replace the zip file. This makes it not easier to rollback to previously versions of your plug-in. For this reason, the Incremental2PackActivator was developed (at least i believe thats why it was developed :P).
The Incremental2PackActivator can handly many zip files. All you have to do is to follow the naming schema. The schema is 2Pack_yournamehere_1.0.0.zip. Heng Sin Low described the naming scheme also in the JIRA ticket: https://idempiere.atlassian.net/browse/IDEMPIERE-1626 So you have to make sure your zip starts with "2Pack_" and ends with "_1.0.0.zip" where the version is exchangeable of course but make sure you have three digits for your versioning. The activator works like the AdempiereActivator. As soon as the plug-in is started, all zip files from the META-INF folder are loaded, ordered by their version number, and packed in.
Notice that, if you use the Version2PackActivator, you have to keep your versioning synchronous between 2Packs and bundle version in MANIFEST.MF. The Activator will look into the manifest. If the version there is 1.0.2, it will install 1.0.0, 1.0.1 and 1.0.2 but not 1.0.3 if it exists. (NOTE: Incremental2PackActivator was changed and it installs all the pending 2Packs independently of the bundle version)
improved Incremental2PackActivator
Thomas Bayen extended the functionality a little bit to also order by the name between 2Pack_ and _version.zip. So if you want to divide your 2pack, you can for example have:
- 2Pack_Tables_1.0.0.zip
- 2Pack_Tables_1.0.1.zip
- 2Pack_Processes_1.0.0.zip
- 2Pack_Processes_1.0.1.zip
The execution order would then be:
- 2Pack_Processes_1.0.0.zip
- 2Pack_Tables_1.0.0.zip
- 2Pack_Processes_1.0.1.zip
- 2Pack_Tables_1.0.1.zip
because first, it is ordered by the version and then alphabetically by the name.
  public int compare(TwoPackEntry o1, TwoPackEntry o2) {
    // tbayen
    int cmp = new Version(o1.version).compareTo(new Version(o2.version));
    if (cmp == 0)
      return o1.url.toString().compareTo(o2.url.toString());
    else
      return cmp;
  }
NOTE: This suggestion is not integrated into core, but in core you can add the comment after the version, for example, instead of 2Pack_Tables_1.0.0.zip you can name your file 2Pack_1.0.0_Tables.zip (after IDEMPIERE-4105). The comment part must not contain underscores _
Packout reference table (detail in window)
you have data at table C_BPartner, this table link to AD_User like a its detail
AD_User again link to R_ContactInterest
so on, C_BPartner also link to C_BPartner_Location in other path.
now you want to packout some record from C_BPartner. you also want to packout all link data of each C_BPartner
this is easy method.
from Package Details create a new record.
choose "Data" for type
choose C_BPartner for Table
fill below query to SQLStatement
"SELECT * FROM C_BPartner WHERE [some fill condition];AD_User>R_ContactInterest;C_BPartner_Location"
between ";" is a path ">" for level step
for more info, read code at function GenericPOElementHandler.exportDetail and GenericPOElementHandler.create

