Configure OAuth2 EMail
Feature: Implement OAuth2 for EMail Authentication
Goal: Security
Developer: Carlos Ruiz
Sponsor: FH
OAuth2 Goal
The goal of OAuth2 is to avoid having the password of the user saved in the database, with the actual plain password authentication, when a database is hacked, the hacker get access to all the passwords, and the situation is worst as many people tend to reuse the passwords in different sites.
The OAuth2 Standard provides a way to authenticate using tokens instead of passwords, the access to a resource is authorized by the user at the beginning, and this creates an authorization token and a refresh token, the authorization tokens usually have a short lifetime (like 1 hour), and every time the authorization token expires it can be refreshed using the refresh token. The user has the ability to revoke the access in the authorization provider.
A deeper explanation of OAuth2 can be found at https://oauth.net/2/
Some known providers for OAuth2 are for example Google and Microsoft. They still provide plain password to be used as mail authentication, but both providers have plans to drop that access in favour of the more secure OAuth2. (reference plan for microsoft )
There are many other providers for this, like in this wikipedia list. For the purpose of this feature we work with EMail authorization providers.
Menu
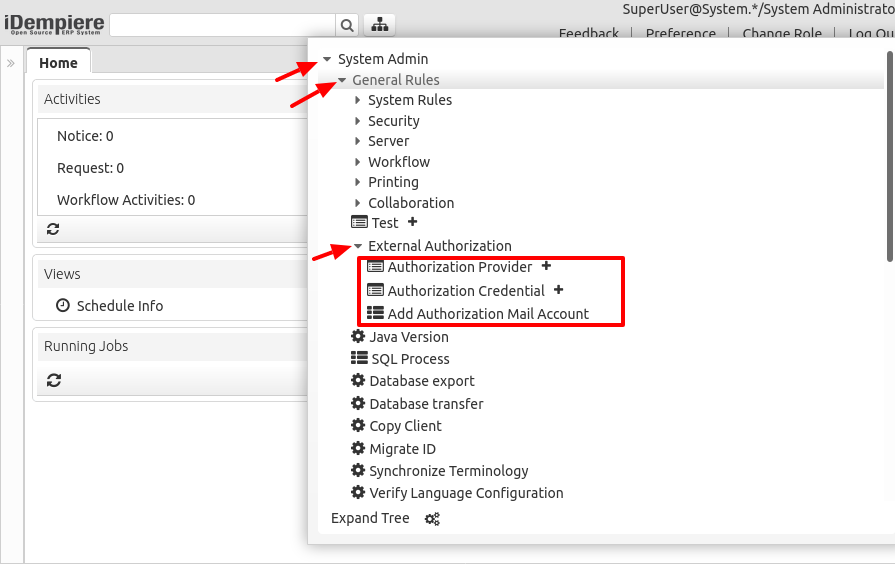
The options for this feature can be found in the menu System Admin > General Rules > External Authorization
Configuration
Authorization Provider
In order to use OAuth2 accounts, first you need to configure the provider(s) that authorize the access to the EMail resource.
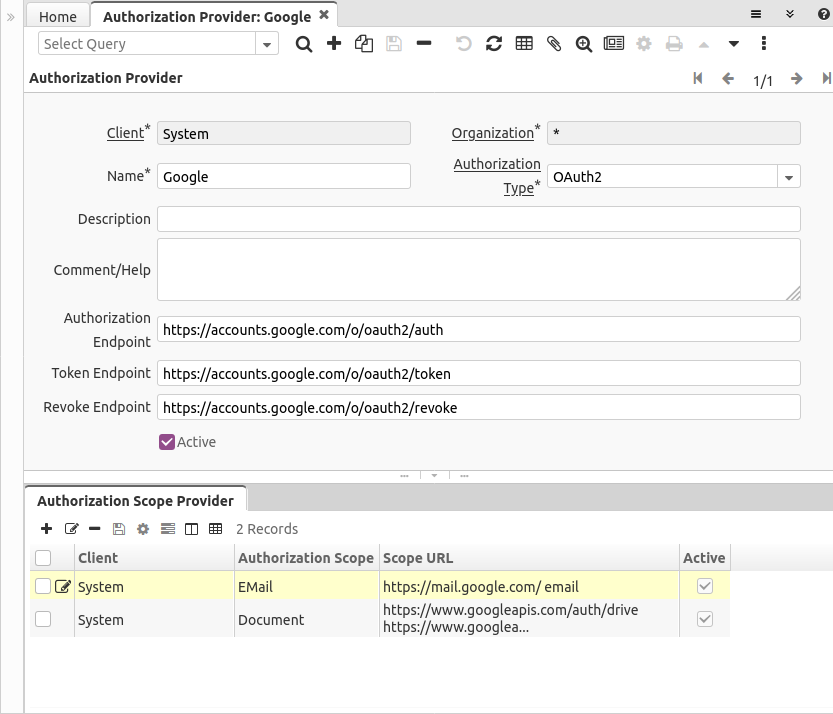
In the Authorization Provider window there is a record preconfigured for Google.
You can define:
- The authorization type, actually just OAuth2 is implemented, we leave this open to implement in future other authentication methods
- Name
- Description
- A longer Comment or Help
- Authorization, Revoke and Token endpoints. These are according to the specification and normally they are provided in the documentation of each provider.
Scope on Authorization Provider
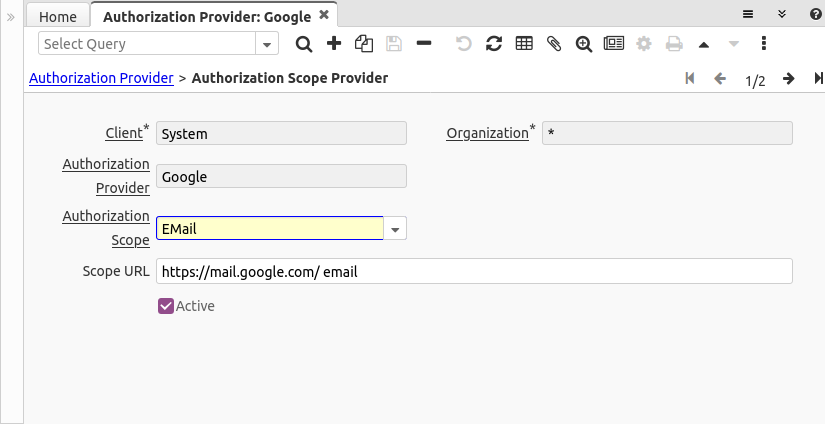
The OAuth2 specification allows every provider to define the scopes they attend, in our case we need to define the scope of type EMail for each provider.
For example, the scopes for accessing google mail are defined at this URL
We use here two scopes separated by space:
- https://mail.google.com/ -> allows "Read, compose, send, and permanently delete all your email from Gmail"
- email -> that allows to view the user email address, we need this to register the email being authorized
Register your application on the provider
Providers require you to register your application on a site provided for them.
Example in Google
For example google requires to register the application at the website https://console.developers.google.com/
The procedure of registering the application in google can be followed at https://developers.google.com/identity/protocols/oauth2
For example, for testing purposes you can register an application like this:
- Navigate to https://console.developers.google.com/
- Create a New Project (Select a project > NEW PROJECT)
- Give a name to the project
- After created it will land in the project dashboard
- In the API & Services module, you navigate to OAuth consent screen
- Then you must select the User Type:
- Internal: this is available just if you are using the developer console as a google workspace organization (not gmail). In this type you can just authenticate users within the organization domain. It doesn't require verification.
- External: in this type google can enable a test mode which can be used just for users you add to a list, if you want to authenticate any domain then you need to pass a verification process in google
- After that you are sent to the OAuth consent screen where you must define:
- App name: this will be shown to the users when authorizing the request
- User support email
- optionally you can upload an app logo that is shown to the user
- you can define too the application homepage, privacy and ToS links
- you can define also here the authorized domains
- and a developer contact email is required
- next you can define the scopes that your application uses
- and next you can define the test users
- Now navigate to Credentials option on the left menu
- CREATE CREDENTIALS > OAuth client ID
- Application Type: Web Application
- Name
- optionally Authorized JavaScript origins
- optionally Authorized redirect URIs
- CREATE
- At this moment a Client ID and Client Secret are shown to you. Take note of these, as they are the values to configure in the Credential screen.
Example in Microsoft
The registration process in Microsoft is done in Azure.
For my tests I followed these steps:
- Register an Azure application following this guide https://docs.microsoft.com/en-us/azure/active-directory/develop/quickstart-register-app
- If you still don't have one, create an account in azure (phone and credit card verification are required)
- Select the tenant where you want to create your directory (Directory + subscription filter)
- By default Azure creates a tenant for you
- Search and select Azure Active Directory
- Manage, select App registrations > New registration
- Enter a Name for your application. Users of your app might see this name. You can change it later.
- For example "test iDempiere"
- Specify who can use the application (Supported account types)
- For my tests I chose: Accounts in any organizational directory (Any Azure AD directory - Multitenant) and personal Microsoft accounts (e.g. Skype, Xbox)
- This value need adapt to "tenant" part on "* endpoint" on "Authorization Provider". To understand about "tenant" then see endpoints. Moment "tenant" of preconfiguration provider Microsoft is "common" just correct for "Accounts in any organizational directory (Any Azure AD directory - Multitenant) and personal Microsoft accounts (e.g. Skype, Xbox)"
- To correct "tenant", you can check endpoints info of app
- When registration finishes, the Azure portal displays the app registration's Overview pane.
- You see the Application (client) ID. Also called the client ID, this value uniquely identifies your application in the Microsoft identity platform. Take note about this as is what you use to register in the Credential window.
- Add a redirect URI
- Add a platform
- Web
- Redirect URIs
- Implicit grant and hybrid flows
- Access tokens (used for implicit flows)
- ID tokens (used for implicit and hybrid flows)
- Configure
- Add a platform
- Certificates & Secrets
- New Client Secret
- Description = test iDempiere client secret
- Expire = Never
- Add
- New Client Secret
- Record the secret's value for use in your client application code. This secret value is never displayed again after you leave this page. This secret value is what you use to register in the Credential window.
Credential
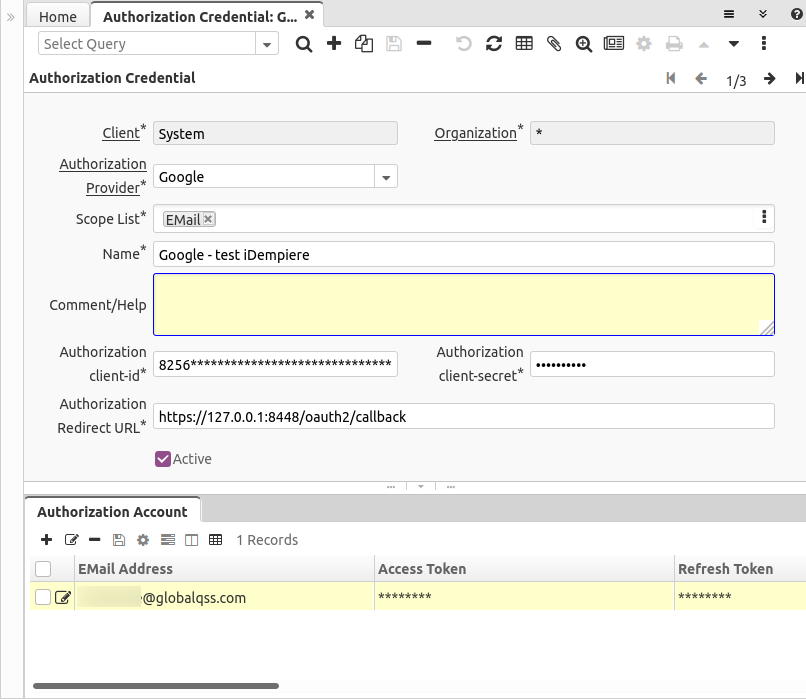
In the Authorization Credential window you can configure the credentials that you got when creating your application on the provider.
You can define here:
- The Authorization Provider
- The list of scopes that can be used with this credential
- Name
- A long Comment or Help
- The client-id and client-secret you obtained from the provider
- and the Authorization Redirect URL, for local testing purposes is usually used https://127.0.0.1:8443/oauth2/callback - but this must be replaced by your server URL when moving to UAT, stage and production servers.
- Important note here: the Redirect URL is expected to be in the same server and port where the application is running, otherwise the monitoring mechanism that closes the popup window doesn't work. Even localhost vs 127.0.0.1 is not allowed here, it must be exactly the same
- Google allows http and microsoft allows it just on localhost, but it is definitely suggested to avoid using http and use encrypted https here
- this field accepts context variables to be parsed, for example you could use
https://@$env.HOSTNAME@:8443/oauth2/callbackif you have a HOSTNAME environment variable defined in your server
User Authorization
Add Mail Account
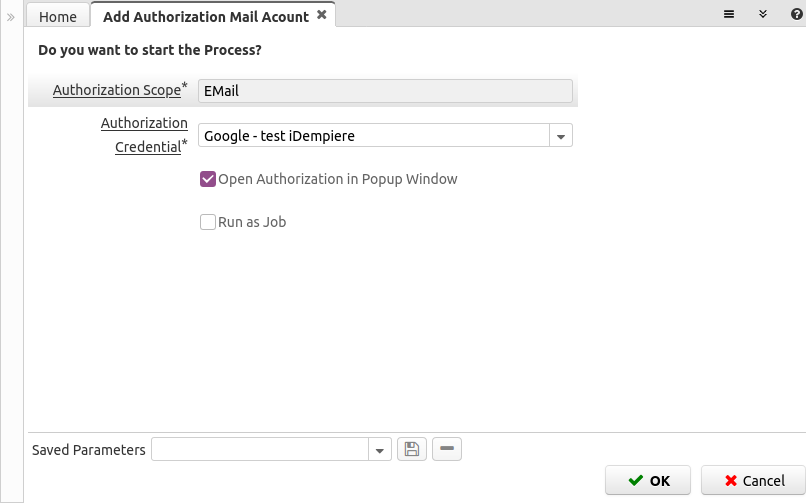
Now you and your users can use the Add Authorization Mail Account window to authorize access to EMail on your provider.
The user must choose from the providers you configured, like:
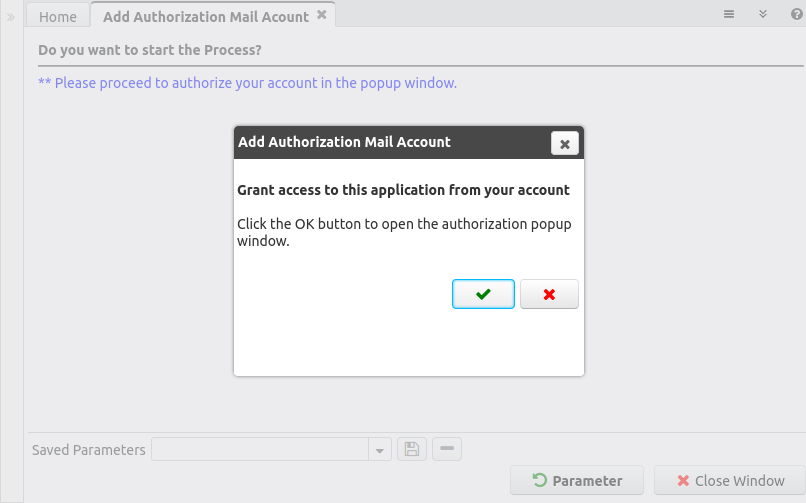
After you confirm the Scope and Credential a new dialog window is shown to confirm the opening of the authorization popup (although this step seems unnecessary it was developed this way to avoid the browsers blocking the popup, it requires an active confirmation from the user clicking on the OK button):
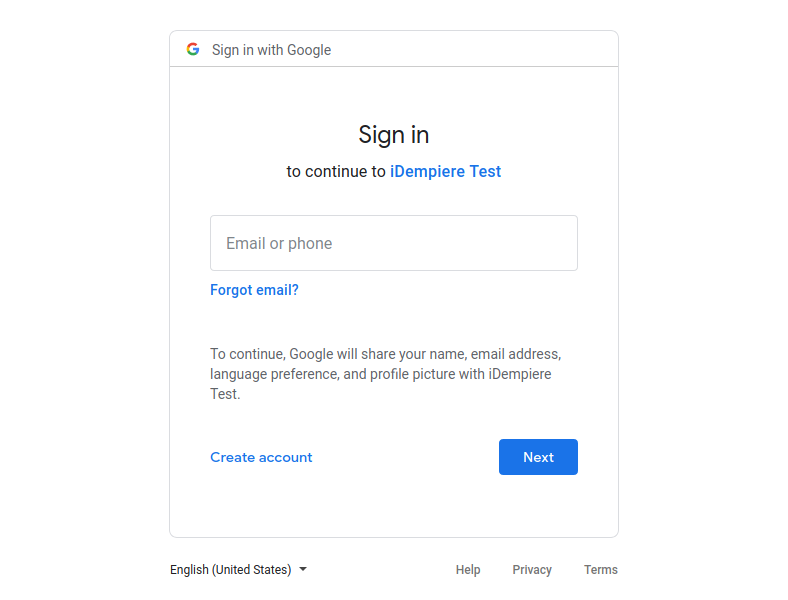
After this a new browser window is opened showing your provider login page
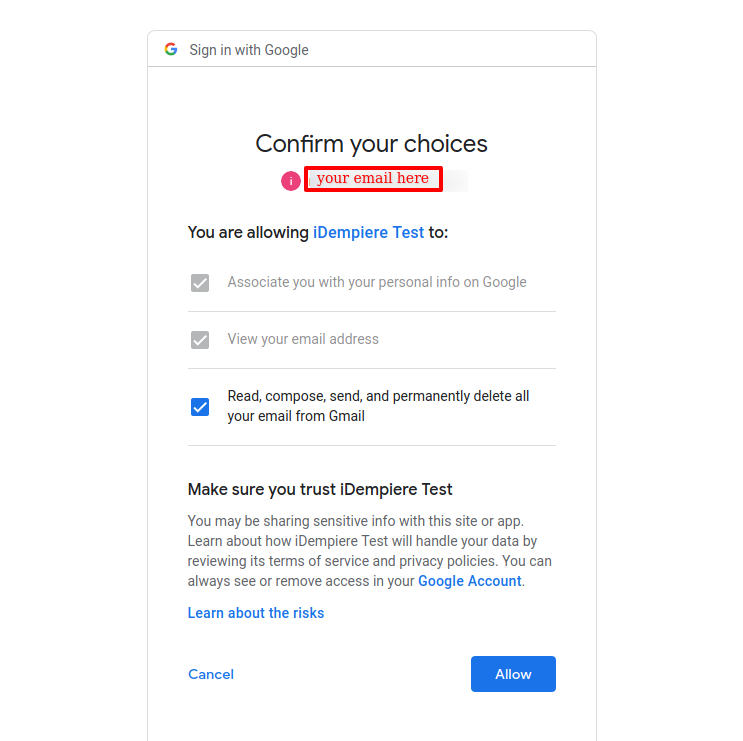
You must login into google as usual and then you are presented with the authorization page
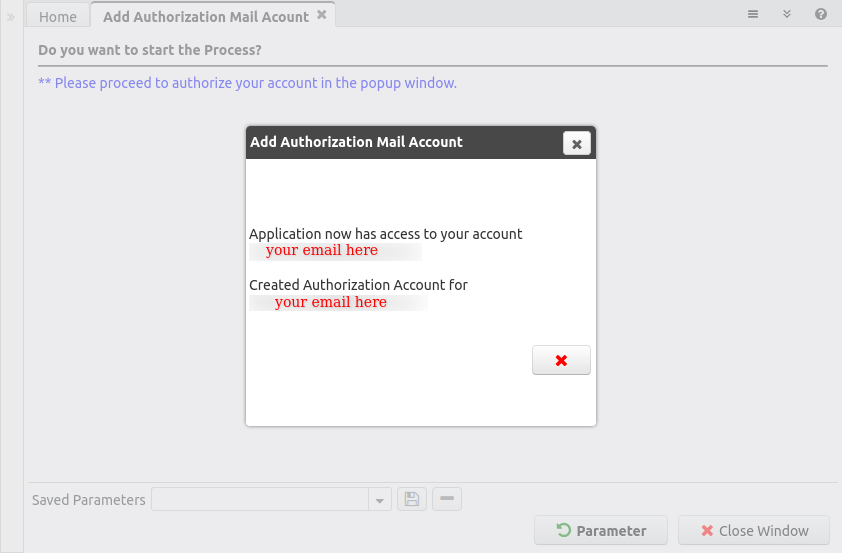
At the end, the application returns to iDempiere showing a message about the success or failure of the operation. When successful it informs if you granted access, or if you have already done that before:
Account
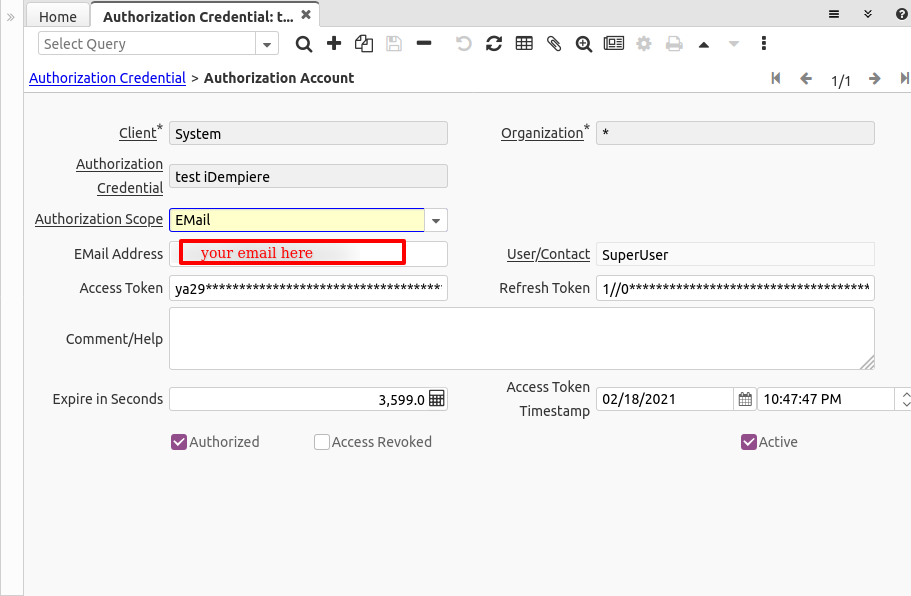
After authorized, a record is created in the Authorization Account tab:
You can find there:
- The Authorization Credential associated to this account
- The EMail Address, this is the address obtained from the provider
- The user that created this account
- The Access and Refresh Tokens
- A long Comment or Help in case you want to make annotations to this account
- The expiration time in seconds, this is defined by the provider
- The access token timestamp, this is the time where the token was created or refreshed and is used in conjunction with the expire seconds to refresh the token
- The flags Authorized, Access Revoked and Active
Manually opening the authorization URL
There is a possibility to use this also without having access to the /webui interface, or opening manually the authorization URL.
Running it with manual opening of the browser
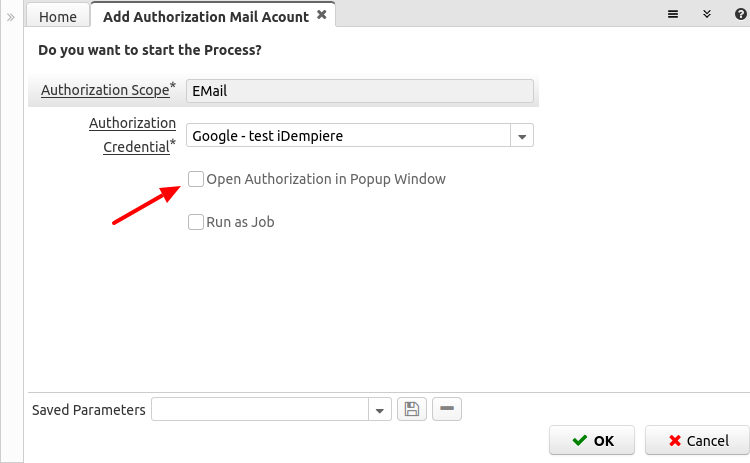
When running the authorization process, uncheck the parameter "Open Authorization in Popup Window" (or when running from a web service pass this parameter as empty
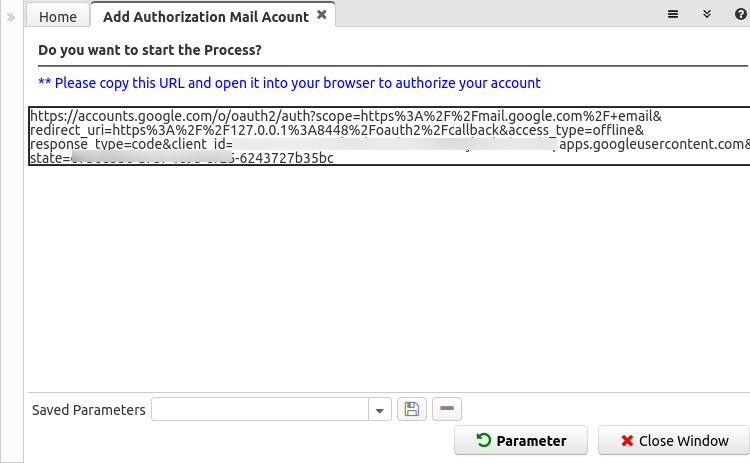
After executed in this way the output looks like this:
When using this way, the user must copy the URL provided, open it in a browser window (can be in another browser) and follow the same flow to authorize the account.
At the end of a manual authorization the user will see an screenshot like this:
Note this Authorization URL expires in a short time (depending on the provider), so is not that the URL can be used forever.
Running Authorization from web service process
Web services can call the process "Add Authorization Mail Acount" filling the parameters:
- AD_AuthorizationScope = The Scope
- AD_AuthorizationCredential_ID = The Credential
- Auth_OpenPopup = N - as this is executed in a background process without browser the parameter must be set to N
- AD_Language = The language - set this to the language of the session running the web service
The process will return the message and in the logs will record the URL to open (again, this URL has a short time expiration - depending on the provider)
Technical Notes on Server
If your server is running behind a proxy, it's required to open the new URL /oauth2 that process the servlet and the answer page.
Execution
The execution is automatic, you don't need to do anything additional for this.
Sending EMail
When sending an email, iDempiere will check if the sender email address is configured as an OAuth2 Account:
- When is an OAuth2 Account it will try to send the email using the authorization token, if is expired will automatically try to get a new one. Please note here the email password is not used and not required at all, however the field password require any value, can be filled with anything, like a dot.
- If the sender email is not registered as OAuth2 Account then the normal plain password authentication is used
Reading EMail
Samely, when using the process Request EMail Processor, iDempiere checks if the reader email address is configured as an OAuth2 Account:
- When is an OAuth2 Account it will try to read the email using the authorization token, if is expired will automatically try to get a new one. Please note here the parameter with the email password can be filled with anything, it's mandatory, but not used.
- If the reader email is not registered as OAuth2 Account then the normal plain password authentication is used
Technical Info
See IDEMPIERE-3101

