Developing Plug-Ins - IModelFactory
This How-To is brought to you by Jan Thielemann from evenos GmbH (www.evenos-consulting.de). If you have questions, criticism or improvement suggestions, feel free to visit me (Jan.thielemann) or write me an email
Goal of this How-To
The goal of this How-To is to show, how you use the IModelFactory service in you plug-in project. The reason why you want to use the model factory service is, that you can provide your own model for custom tables and iDempiere will make use of them (e. G. the beforeSave method gets called). Also if you want to use the Query class, it is necessary to provide your own models. Otherwise, a Query will return a "GenericPO" instead of your model class.
Prerequisites
Before you start this How-To, you should take a look at the following How-Tos:
- Developing Plug-Ins without affecting the Trunk
- Developing Plug-Ins - Get your Plug-In started
- Developing Plug-Ins - ModelValidator
tl;dr
https://www.youtube.com/watch?v=Pxi46BmIrTw https://www.youtube.com/watch?v=F1lFHS2riG4
The workflow
X_, I_, M? Which class is for what?
In iDempiere we have different classes for our models. The toplevel class is called PO which stands for Persistent Object. Every models inherits it's methods. If you generate models or take a look at the existing ones, you will see that most of the tables have a X_ and I_ class.
The I_ class is an interface which has information about the table and it's columns. It has a constant for the table name, it's ID in the Application Dictionary (which is loaded dynamically via MTable.getTable_ID()) and every column in the table. It also has the template for all the getter and setter methods.
The X_ class is the basic model of every table. Here PO is extended and the I_ class is implemented. The X_ class implements all the getters and is the first class which could apply custom business logic (but don't put your business logic in here, you will learn why in a second). If you take a look at the code, you can see that the getter and setters which are implemented here often do some kind of validation to the data and use the POs methods to persist the data.
The last class is the M class. Its naming scheme is "M" + "table prefix (if >=3 chars)" + "table name without spaces or underscores". So if my table is called eve_this_is_my_table, i would create it in the Application Dictionary as "EVE_This_Is_My_Table" (notice the camel case writing). My model would be called "MEVEThisIsMyTable". Feel free to not use the table prefix but i like it because it makes spotting custom models easier. So what is the use of this M class which is not implemented automatically by the model generator? Thats easy to explain. All your custom business logic goes into this class. Why not using the X_ class? Because your table can change over time and everytime, you can simply run the model generator to recreate your I_ and X_ classes but you would lose all your custom business logic if it were in the X class. So by creating a M class which extends the X_ class you can regenerate your models without losing any code or functionality.
What can you do in the M class? Some examples are:
- Overwrite the beforeSave(), afterSave(), beforeDelete(), afterDelete() model hooks
- Implement the DocAction interface to make your table act like a document
- Create special getters and setters (like MOrder.getLines())
IModelFactory
NOTE: If you use Eclipse Oxigen or a newer version, you can use annotations instead of creating the component definition manually. Read more about it here
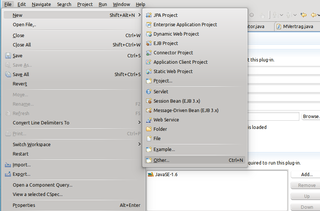
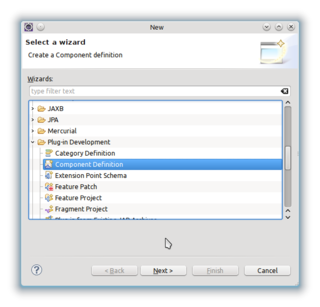
After creating the plug-in and setting its dependencies, click on File>New>Other... and select "Component Definition" from the Plug-in Development section.
Click on next. Select your plug-in project and chose a file name and a general name. We often use "defaultmodelfactory.xml" and "my.domain.model.factory" for the filename/name but every other name is okay too. You don't need to set the class name yet because we haven't implemented one. Click on finish.
The next things we will need is:
- A Model
- A ModelFactory (which is just a class which implements IModelFactory
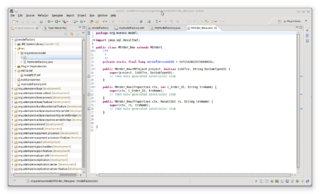
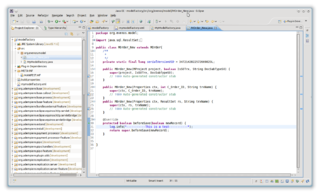
Notice that your model factory and your model class must be implemented in different classes. It will not work if you try to implement IModelFactory in one of your models. The good news is, you only need one model factory for all your custom models. For our How-To, we will use a custom subclass of MOrder. Create the class MOrder_New which inherits from MOrder and implement the default constructors:
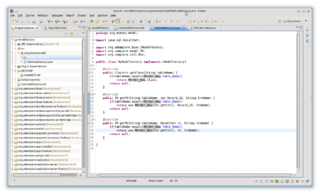
The second class only implements IModelFactory and is called MyModelFactory. In getClass() we check if the table name is equal to our custom models table name and return the model class if it is. In the both getPO() methods, we use our custom models constructors to create new instances.
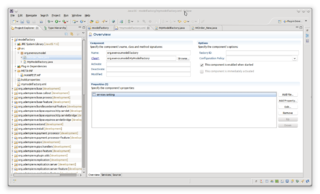
Open the mymodelfactory.xml and click on the Browse button to select the MyModelFactory class. Also add a integer property called "service.ranking" with a positive value (>0).
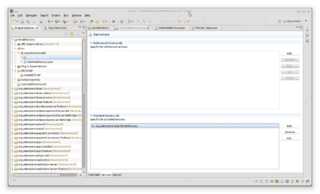
On the Services tab, add the IModelFactory to the "Provided Services" section.
Basically thats all you need to do. To see that we realy did someting, open your custom model class again and add a console log in beforeSave()
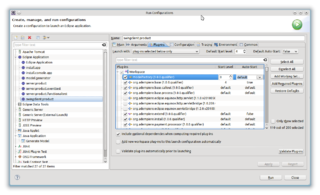
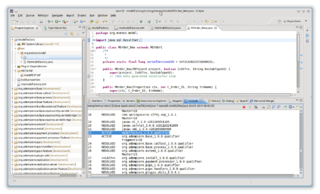
Make sure that your plug-in is active in the run configurations
Start the client and make sure your plug-in is active
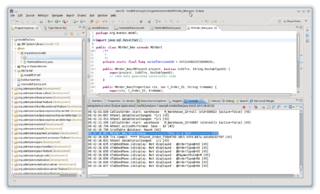
Now log in as GardenAdmin/GardenWorld and create a new Sales Order fill in all mandatory fields and click on save. Take a look at your console log, you should see the log from your custom model class:
AbstractModelFactory
It is encouraged that new model factories extend from AbstractModelFactory as it takes care of most of the common tasks assigned to model factories.
Please note that this class was added to the iDempiere 9 codebase.
Since iDempiere 9: AnnotationBasedModelFactory
This is the new default model factory that can be used/extended from iDempiere plugins. It detects model classes automatically as long as they have the @Model annotation. Model classes with M prefix don't have to be annotated, as long as their X classes (discussed above) are annotated. The default model generator (discussed below) was also modified in order to annotate X classes automatically.
This code snippet shows how to implement a model factory on a plugin by extending AnnotationBasedModelFactory. Implementing classes are encouraged to indicate what are the packages where they model classes are located, by overriding the getPackages method.
AnnotationBasedModelFactory was added as part of the iDempiere 9 codebase.
Map Based Factory
With this type of model factory one must declare for each table:
- Association between table name and its model class
- Model class instantiation for numeric identifier
- Model class instantiation via
ResultSet
package org.evenos.factories;

import org.idempiere.model.MappedModelFactory;

public class MyModelFactory extends MappedModelFactory {

	public MyModelFactory() {
		addMapping(MEVESub.Table_Name, () -> MEVESub.class
			, (id, trxName) -> new MEVESub(Env.getCtx(), id, trxName)
			, (rs, trxName) -> new MEVESub(Env.getCtx(), rs, trxName));
		addMapping(MEVEMain.Table_Name, () -> MEVEMain.class
			, (id, trxName) -> new MEVEMain(Env.getCtx(), id, trxName)
			, (rs, trxName) -> new MEVEMain(Env.getCtx(), rs, trxName));
	}

}
Generating Models for custom Tables
If you don't just want to overwrite a core model but provide your own model classes you need to do some steps.
- Create your table in the database
- Create an entry for your table in the Table and Column window
- Open Eclipse and start the generate.model App
- As the Source Folder, choose the "src" folder of your Plug-in
- As the Package Name chose a package name of your choice or use org.compiere.model if you like
- As the Table Name chose your prefix (custom tables should have 3 letter prefix in the db) and add some characters to identify your table. For example, if your table is called eve_this_is_a_table, then you could enter "eve_this%". Make sure you use the correct upper/lower case writing!
- As the entity type, chose the entity type you selected in the DB. Normaly it's "U" for user maintained
- Check both checkboxed and generate your I_ and X_ class
- Feel free to implement a custom M class
Troubleshooting
- Make sure that in your modelfactory.xml you have a unique name (my.domainname.pluginname.model.factory is a good idea) and that you selected the right class
- Make sure there is no other model factory with a higher service.ranking property
- Make sure you have a seperate model/model factory class
- Make sure your plug-in is activated before you log in
- Make sure your MANIFEST.MF contains a row with "Service-Component: " and the path to your modelfactory.xml (e. g. "Service-Component: mymodelfactory.xml")

