Wanda POS User's Guide
- Done by: Fonyuy Taryuni Isidore
- Developer: IT Kamer Company Ltd.
- Date: Wednesday, 17th September 2014
- Origin PDF: Get Wanda POS User's Guide pdf
User’s Guide Authorization Memorandum
I have carefully assessed the User’s Guide for Wanda POS. This document has been completed in accordance with the appropriate requirements.
MANAGEMENT CERTIFICATION – please check the appropriate statement
- __________ The document is accepted
- __________ The document is accepted pending the changes noted
- __________ The document is not accepted
Revision sheet
| Release No. | Date | Revision Description |
| Rev. 0 | Wednesday, September 17, 2014 | User’s manual template and checklist |
| Rev. 1 | Sunday, September 22, 2014 | First complete User’s Guide in .docx format |
| Rev. 2 | Monday, September 23, 2014 | Cover page added. Pending approval. |
| Rev. 3 | Friday, October 17, 2014 | First release |
System requirements
Minimum system requirements
Java Runtime Environment [JRE1.6]
Recommended requirements
- Java Runtime Environment [JRE 1.8 or higher]
- iDempiere
- POS Integration Plugin for iDempiere
Downloading the Software
- Just in case you don’t have the software yet and want to download it.
- Visit the Wanda POS source forge page by clicking on the link below.
- Or download directly by clicking on the download link below.
1. GENERAL INFORMATION
a. System Overview
Wanda POS is a Point of Sale. It keeps track of all cash coming into or going out of a business by monitoring purchase of supplies and raw materials and sales of finished products. This system is extensible and suitable for all sorts of businesses, be them restaurants, stores, malls or supermarkets. It can be configured to meet the particular needs of the business in question.
b. Product References
| Reference | Description | Link |
| Wanda POS Support | For users who seek support on certain issues concerning Wanda POS | [ http://wandaapos.com/support.html] |
| Wanda POS Download | Link to download the latest version of Wanda POS | [ http://sourceforge.net/projects/wandaposdapos/files/latest/download?source=files] |
| Wanda POS Developers Support | For developers who are interested in working on Wanda POS | |
| Support Libraries for Wanda POS | For other libraries needed for smooth operation of WandaPOS | [ http://sourceforge.net/projects/wandaposdapos/files/] |
c. Authorized Use Permission
Wanda POS is a free and open source project. It is governed by the GNU Public license. As such, anybody is free to copy any part or all of the code and modify as they please. However, whatever development made as such must be uploaded and made open source for the world to benefit from.
d. Points of Contact
i. Help Desk
| Contact Name | Contact Type | Department | Telephone | E-mail/Web |
| Redhuan D. Oon | Project guru | ERP Systems | 76781554 | red1(at)red1-dot-org |
| Dr. Stanley Mungwe | Project leader | Medical Surgery | 79910862 | sales(at)itkamer-dot-com |
| Eyog Yvon Leonce | Developer & Tester | Software Engineering | 72469067 | grandeyl(at)gmail-dot-com |
| Tatioti Mbogning Raoul | Senior Developer & Tester | Software Engineering | 70043657 | tatiotir(at)itkamer-dot-com |
| Sondi Michael Raphael | Developer & Support | Networks Engineering | 76724430 | mikaelsondi(at)gmail-dot-com |
| Fonyuy Taryuni Isidore | Developer, Support & Documentation | Software Engineering | 77952965 | Isidore(at)itkamer-dot-com |
ii. Coordination
This is a point of sale. Hence, Wanda POS alone cannot perform any accounting operations. To get this ability to perform various accounting tasks such as tracking profits and losses and providing business/managerial advice and predictions. Wanda POS works hand-in-glove with iDempiere. IDempiere is an ERP system which Wanda POS uses to be able to perform accounting operations.
e. Acronyms and Abbreviations
| Abbreviation / Acronym | Meaning |
| POS – Point Of Sale | Software system that tracks all inflow and outflow of cash, how the cash moves, by whom, where, when etc. |
| ERP – Enterprise Resource Planning | Planning all financial resources well ahead of time. Takes care of all financial calculations, predictions based on present data and does all the accounting. |
| FOSS – Free and Open Source Software | Software that you can obtain free of charge and also have unlimited access to its source code. Governed by the GNU public license. E.g. iDempiere, OpenBravo POS, Wanda POS, VLC etc. |
f. Document Conventions
| Convention | Explanation |
| Bold | Buttons and links that appear the same as shown in the demo |
| [This is a comment ] | Any text that appears within square bracket is an aside, a comment or an explanation of the preceding concept. |
g. Buttons and Icons
2. GETTING STARTED
Logging On
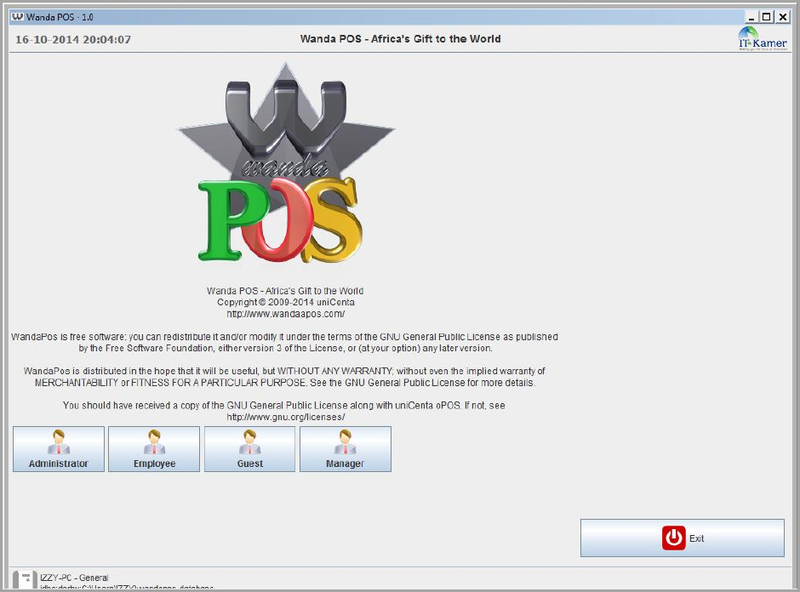
When you launch Wanda POS for the first time you will receive a message prompting you to create a database. Just click on Yes and let the software handle the database creation.
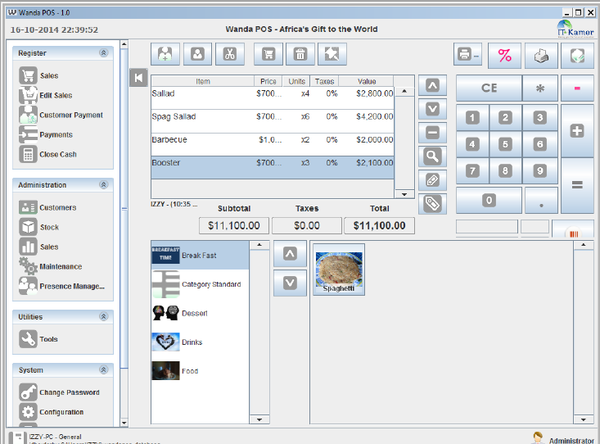
With subsequent launches your screen will be similar to the one shown below.
User Access Levels
There are four types of users who have different access levels.
Guest:
Any user in this category is able to place an order by raising a new ticket.
Employee:
Added to the abilities of a Guest user, any user in this category is able to Edit sales and make/record payments. They can also change their password.
Manager:
Added to the abilities of an Employee, any user in this category is able to manage customers, close cash, view closed cash, manage stock and manage sales.
Administrator:
Added to the abilities of a Manager, any user in this category is able to do maintenance, configurations and printer settings.
NB:
When you log in your information is displayed on the bottom right corner of the screen
Changing User ID and Password
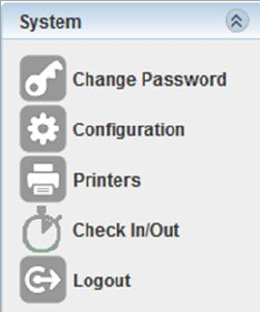
To change passwords a user must login to their account. On the system panel [left side of the screen], click on ![]() .
.
Exit System
Click on ![]() to get back to the welcome screen. It’s in the System panel on the left side of the screen. Click on
to get back to the welcome screen. It’s in the System panel on the left side of the screen. Click on ![]() to exit the system. It’s at the bottom right corner of the window.
to exit the system. It’s at the bottom right corner of the window.
3. USING THE SYSTEM
Quick Tour
- Horizontal Menu
- Register Panel
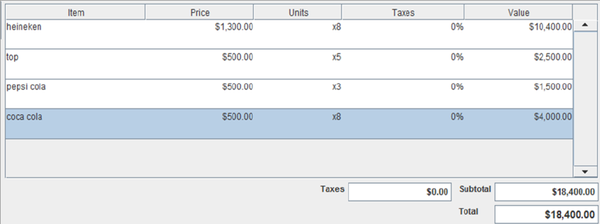
- Ticket Display
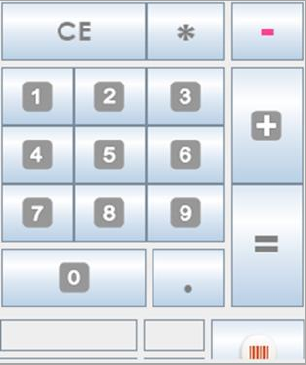
- Calculator
- Vertical Menu
- System Panel
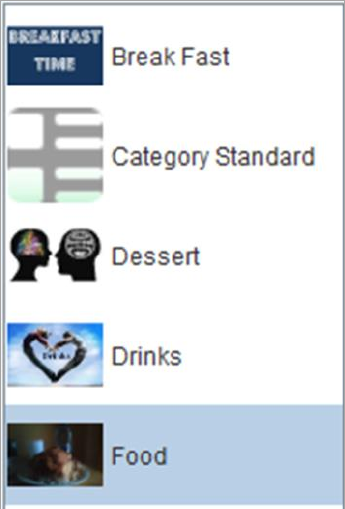
- Categories Display
- Items Display
- NB: This user guide will be approached from a user access level perspective. i.e. For any feature or functionality under demonstration, we illustrate using a user with the minimum access levels required.
Placing an order
To make an order you either use an existing ticket (layaway) or start a new sale.
While placing an order, if you have any doubts as to what particular item you are picking, select the item on your ticket and click on the Attributes button ![]() on the Vertical Menu. If the item comes in different types or flavors they are displayed in a pop-up window for you to specify exactly which one you want.
on the Vertical Menu. If the item comes in different types or flavors they are displayed in a pop-up window for you to specify exactly which one you want.
Using an existing ticket
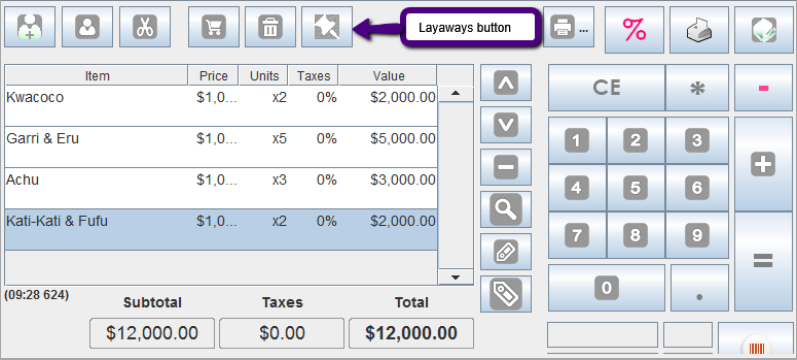
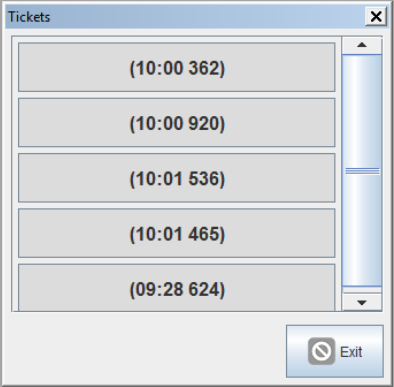
To place an order using an existing ticket click on the layaways button ![]() in the horizontal menu. A new dialogue box pops up showing a list of all recent tickets. Click on the ticket you want to use.
in the horizontal menu. A new dialogue box pops up showing a list of all recent tickets. Click on the ticket you want to use.
Example: Using an existing ticket to place an order
Starting a new ticket
Most of the time, you’ll have to start your own ticket. To do this, follow the steps shown below.
- a. Click on the New Sale button
 [third button from the right of the horizontal menu]. The Ticket Display area is cleared out for you to start your order.
 - b. Click on the category to which your item belongs [the item you want to add to your order]. All items in this category are displayed in the Item Display area.
- c. Click on a number on the calculator. [the number of items you want]
- d. Then click on the particular item you want to order.
- e. Repeat (b.), (c.) and (d.) until you’ve added everything you need unto your ticket.
NB: If you mistakenly order too much of a particular item and you want to make changes to it, call an employee to help [If you have just a guest account it might be hard for you to edit an item on the ticket.
That’s why you need help]
Example, starting a new ticket
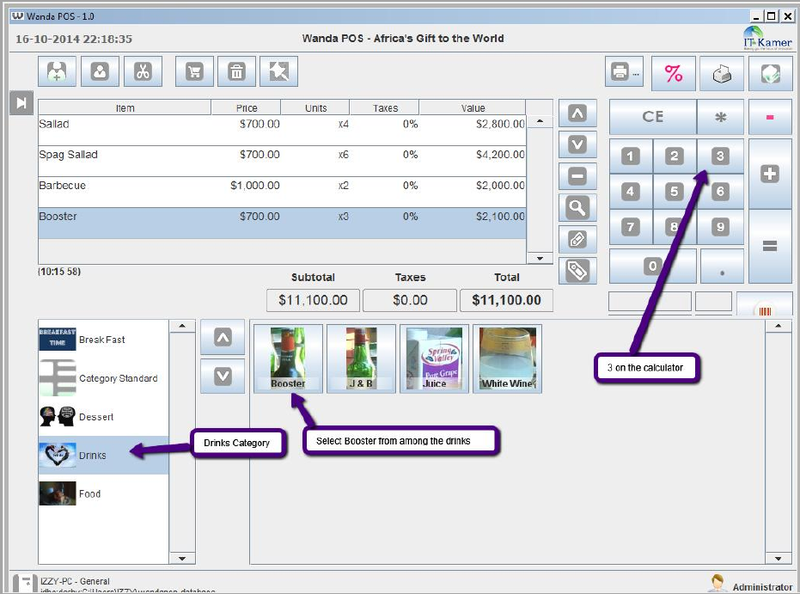
Let’s order 3 boosters. Booster is a drink. So we’ll click on the drinks category to display all drinks. We’ll click on 3 in the Calculator and select booster from the Items Display Area.
Adding ID to your ticket
NB: this applies only to people with customer accounts. If you are a regular (and trust worthy) customer, it is very likely that you’ll be given a customer account.
After placing your order you may want to add identification to your ticket. To do this,
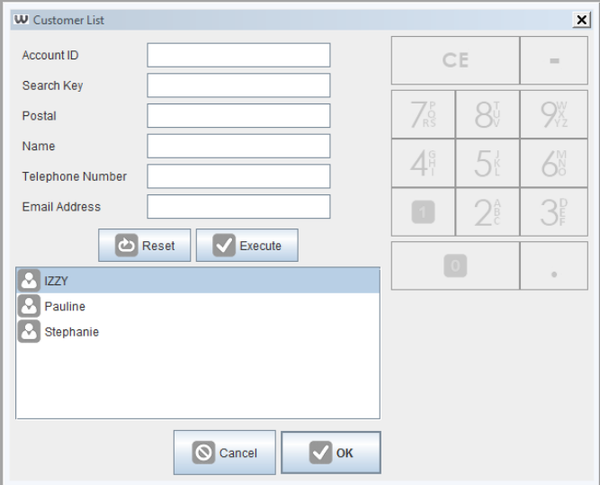
- a. Click on the Show Customers
 [first icon on the horizontal menu, to the right of the Time Display]. A customers list pops up.
 - b. Enter your Tax ID, Search key or Name. [NB: it is case sensitive e.g. if your name is Stephanie and you write Stephanie instead, it won’t work]
- c. Click on
 . A list of all customer accounts with the same filter options is displayed.
 - d. Select your name from the list and click
 . Your name is added to your ticket [to the left of the timestamp in the Time Display]
Searching for a particular item in stock
To search for a particular item to add to your ticket proceed as shown below.
- a. Click on the Search button
 on the Vertical Menu. A product list pops up.
 - b. You can search for an item by Barcode, Name, Category, Buy Price or Sell Price. Put in the search conditions you want.
- c. Once you’re done click on
 . A list of all items which fulfill your conditions will be displayed.
 - d. From the list select the item you want. Use the Calculator to specify the quantity you want.
- e. Click on
 to add the item to your ticket.
OR [for more experienced user and/or customers]
- a. Click on the rectangular text box below the calculator.
- b. Enter the Barcode for the particular item you are searching for.
- c. Click on the Barcode icon to add the item to your ticket.
Example, searching for a particular item.
Let’s search for all items sold for $1000 or less and whose names have a c in it. Let’s say the item that’s the first to ‘pass our test’ we’ll buy 2.
- a.Click on the Search Icon
 to display the product list. In the text field labeled Name, type in the letter c.
 - b.Click on the drop down menu labeled Sell price. Select Less or equals from the drop down list.
- c.In the text field to the right of it, type in the amount 1000.
- d.Click on
 to display all items that fulfill the specified conditions.
 - e.Select the first item on the list displayed and click
 . The item is added to your ticket.
 - f. Click on the edit button
 on the Vertical Menu beside the Calculator. An Edit line pops up.
 - g. Use the buttons on the Calculator to specify the quantity you want. In case you make any mistake click on
 and specify the quantity to want.
 - h. When you are done click on
 to effect the changes you’ve made.
Making changes to items on your ticket
Every now and then you’ll make a mistake. It’s very easy to correct this.
- a. Click on the item you want to Edit, and then click on the Edit button
 on the Vertical Menu. An edit screen pops up.
 - b. Use the Calculator to make the necessary corrections on the quantity you want to order.
- c. In case you still make a mistake while on this screen click on
 on the Calculator and enter a new value for the quantity.
 - d. Once you are done click on
 to effect the changes.
Example: making changes to items on your ticket
You might accidentally add 20 boosters to your ticket instead of the 2 you intended. This is how to
correct it.
- a.Click on the Edit button
 on the Vertical Menu.
 - b.Use the Calculator on the Edit Screen that pops up to make the necessary changes. Click on
 on the Calculator, and then click on
  to effect the changes. The quantity of booster on your ticket now changes from 20 to 2.
 - c. Repeat the process for each item you want to edit.
NB: for ease of use a few extra buttons are provided on the Vertical Menu. These include the UP ![]() and DOWN
and DOWN ![]() Arrows for switching between items on your ticket, an Attributes icon
Arrows for switching between items on your ticket, an Attributes icon ![]() to show you the properties, picture and description of the selected item, an Edit icon
to show you the properties, picture and description of the selected item, an Edit icon ![]() to change to quantity of a particular item on your ticket and a Search icon
to change to quantity of a particular item on your ticket and a Search icon ![]() to search for a particular item or set of items to select from.
to search for a particular item or set of items to select from.
NB: So far we have been using the system as a Guest user would. A guest user has everything (s)he needs to make an order. However, only some with Employee access *1 can print a receipt or delete an existing receipt.
Removing an item from your ticket
To remove an item from your ticket
Example: Removing an item from your ticket
Let’s say we ordered 1 Top, 3 Champagnes and 2 Boosters. We decide we don’t to drink Champagne anymore. We want to remove it from the ticket.
- a. Click on Champagne (in the Ticket Display section of your window)
- b. Click on the Remove button
 to drop it.
Splitting a bill
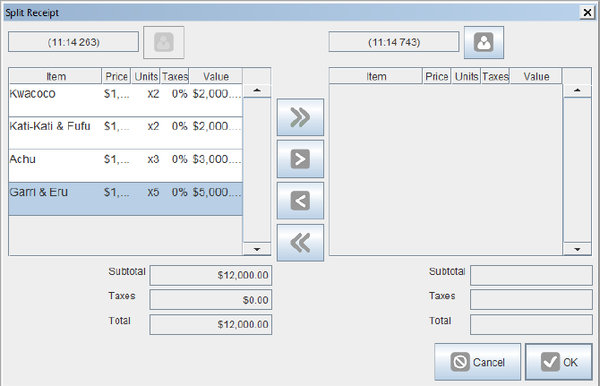
You may want to pay part of another person’s bill OR someone may make the offer to pay part of your bill. It is possible with the Split Bill feature. Proceed as follows
- a.After placing items of the ticket click on the Split Bill button
 (pair of scissors –second button from the left on the Horizontal Menu)
 - b.Use the buttons at the center of the pop up window to split the bill as desired
c.Click on ![]() to effect the changes OR
to effect the changes OR ![]() to Cancel.
to Cancel.
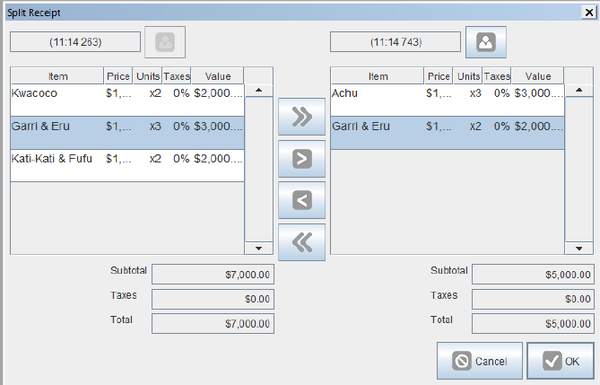
Example: Splitting a bill
Let’s say Paola orders 9 Tops, 2 Boosters, 4 Malt Ups, 3 Champagnes and 2 Whiskies. She doesn’t have enough to pay and Izzy offers to settle part of the bill. Izzy is willing to pay for all the Whiskies, 1 Champagne and 2 Tops. Proceed as follows
- a. Click on the Split Bill button

- b.On the right side of the pop up window click on the Customers button
 to display the Customer List.
 - c.Use the pop up window that appears to pick the customer who will pay the other part of the bill. (in our case the Customer is Izzy).
- d.To empty the list click on the test field labeled Name and then click on
 . Do the same
for all other fields.
- e.Click on
 to display a list of all customers OR
 - f.Search for a particular customer by entering their Tax ID, Search key or Name or a combination of them, then click on
 .
.
- g.Select the customer’s name from the list and click on
 . The customer whose name was selected is appended to his section of Split Bill window.
 - h.Select Whisky from the list and click on the Send All button
 to transfer all Whiskies to Izzy’s section of the bill.
 - i.Select Champagne from Paola’s section *left+ and click on the Send One
 button to transfer 1 Whisky to Izzy’s section (right) of the bill.
j.Select Top from Paola’s section and click twice on the Send One ![]() button to transfer 2 Tops
to Izzy’s section of the bill.
button to transfer 2 Tops
to Izzy’s section of the bill.
- k. Click on
 to effect the changes. The focus is shifted to Izzy’s section of the bill.
 - l. Selected the mode of payment )Cash
 , Cheque
 , Voucher
 , Card
 , Debt
 or Free
  ). Perform the transaction. (Get the money from the customer depending on the mode of payment selected)
 - m. Once the transaction is done click on the Print button to print the receipt, and then click on
 to record the transaction.
 - n. To record Paola’s part of the transaction, click on the Equal button
 on the Calculator.
 - o. Select the mode of payment and perform the transaction (collect the money from Paola)
Making payments
Each time an Employee receives money or gives out money it must be recorded. To do this proceed as follows
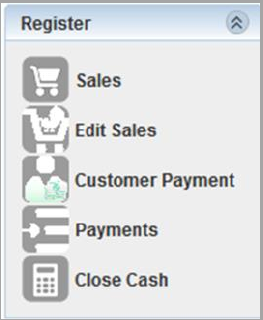
- a. Click on Payments, located on the Main Panel on the left side of the screen.
- b. Click on the New button
 to start a new payment.
 - c. Click on the drop down menu labeled Reason and select the appropriate option.
- i. If you’re receiving money select (in)Cash from the drop down list. OR
- ii. If you’re paying out money select (out)Cash from the drop down list.
- d. Click on the text field labeled Total and use the Calculator to enter the amount.
- e. Click on the Save button
 to save.
Example: Making payments
Let’s say we’ve just made another sale for 50000 and later we refund 5000 to the customer. We’ll record this as follows.
- a. Click on Payments, located on the Main Panel on the left side of the screen.
b.Click on the New button ![]() to start a new payment.
c.Click on the drop down menu labeled Reason and select the appropriate option.
d.From the drop down list select (in)Cash.
e.Enter the amount *in our case it’s 50000+ and click on the Save button to save.
to start a new payment.
c.Click on the drop down menu labeled Reason and select the appropriate option.
d.From the drop down list select (in)Cash.
e.Enter the amount *in our case it’s 50000+ and click on the Save button to save.
h.Click on the drop down menu labeled Reason and select the appropriate option. i.From the drop down list select (out)Cash. j.Enter the amount *in our case it’s 5000] and click on the Save button to save.
- k. You can click on the Cancel button to undo the operation in case you made a wrong entry.
Printing a receipt
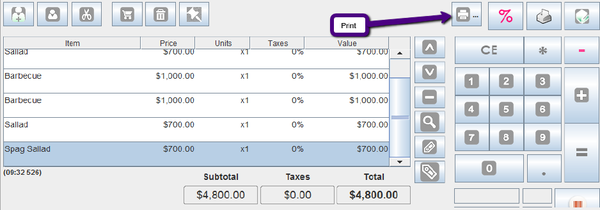
We print a receipt only after a transaction has been made or a sale recorded. To print a receipt, proceed as follows.
- Do all prerequisites like placing the order, making the payment and collecting the money
- Click on the Print button
 to the right of the Horizontal Menu.
Example: Printing a receipt
House Keeping
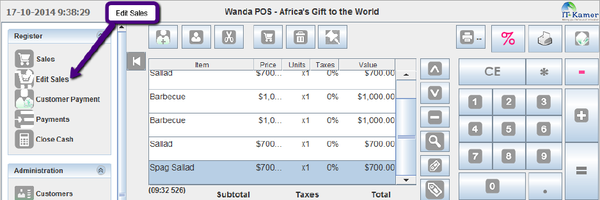
Everybody makes. You may accidentally print a wrong receipt, over order OR a customer might need a refund. Don’t be alarmed if any such thing happens. You can make all the necessary corrections. Edit sales [on the Main panel on the left sidebar of the screen] is where to do all such House Keeping.
And this is what it looks like
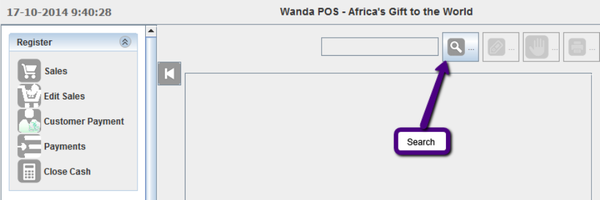
Searching for a particular receipt
To search for the receipt you want to edit, proceed as follows
- Click on the Search button
 on the Horizontal Menu.
 - Use the pop up window to locate the particular receipt you want to edit, then click
 to display all receipts that satisfy the conditions you gave above.
 - Select the receipt from the list and click
 .
. - The receipt is displayed for you to see the details of the transaction. Then you can either print the receipt refund it or search for a different receipt.
Example: Searching for a particular receipt
To search for the receipt you want to edit, proceed as follows
- Click on the Search button
 on the Horizontal Menu.
 - Use the pop up window to locate the particular receipt you want to edit, and then click
 to display all receipts that satisfy the conditions you gave above.
 - Select the receipt from the list and click
 .
.
The receipt is displayed for you to see the details of the transaction. Then you can either print the receipt refund it or search for a different receipt.
Making refunds
To make a refund you have to find the receipt you want to refund. Proceed as follows.
- Search for the receipt you want to refund [search as shown above] and select the receipt.
Example: Making refunds
Let’s say Stephanie ordered 3 Boosters, 6 Tops, 2 Whiskies and 4 Heinekens. She couldn’t pay for all and Maurice offered to pay for 1 Whisky and 1 Heineken. Maurice falls short of cash and asks for a refund,
but he wants to collect the money he spent on whisky and let Stephanie get the rest (for 1 Heineken).
- Search for the receipt you want to refund [search as shown above] and select the receipt. (After finding the receipt you either refund it or print it out.)
- Click on the Refund button
 .
. - On the refund window that shows up click on the Refund All button
 .
. - Once the items are added to Ticket Display sections of your screen click on the Split Bill button
 .
. - Click on the Customers button
 on the right half of the new window that pops up.
 - Use the various filters to find the particular customer (Check above for details on ‘how to search for a particular customer’) you are looking for (in our case, Stephanie). Select the customer’s name and click
 to append the name to the ticket.
 - Click on Heineken and click on the Send One button
 to transfer it to Stephanie’s section of the bill.
 - Click on
 , select the means of refund (Cash, Cheque, Voucher, Card) and click on
  , and then give out the cash to Stephanie.
 - The rest of the transaction has to do with Maurice. Click on
 on the Calculator, select the refund medium and click on
  .
.
Let’s say when Maurice walks out we realize Stephanie had been playing games and just wanted to get some of his money. She decides she wants to refund 2 Heinekens, 1 Top and all 3 Booster. This is how to go about it.
- Search for that particular receipt and open it.
- Once the receipt is displayed click on
 .
. - Select Heineken from the list and click on
 , and then click on the Plus button
  to add 2 Heinekens to the refund list.
 - Select Top from the list and click on
 to add 1 Top to the refund list.
 - Select Booster from the list and click on
 to add all 3 Boosters to the refund list.
 - Now that all items all items we want to refund have been added to the refund list let’s get done. Click on the Equal button
 on the Calculator.
 - Select the mode of payment and click on
 . Click on the Print button
  above the Calculator to print a receipt for the Customer (Stephanie).
Deleting a receipt
To cancel a receipt, proceed as follows.
- Select the ticket which corresponds to that receipt.
- Click on the Delete button
 which is located on the Horizontal Menu (second from the right).
 - A dialog box pops up with the question “Are you sure you want to delete the current receipt?” Select Yes to delete or No to cancel.
Example: Deleting a receipt
Let’s say we’ve made our order by creating a ticket, and now we want to delete it.
- Select the ticket which corresponds to that receipt.
- Click on the Delete button
 which is located on the Horizontal Menu (second from the right).
 - Select
 to delete. OR
 - Select
 to cancel.
4. REPORTING
This can only be done by users with Manager and Administrator access. As such it’s been left out and included in the Administrator’s Guide.
Check out the Administrator’s Guide for details.


