
Plugin: Beluga Serverprint
From iDempiere en
creating printable documents and distribute or print them
- Creator: Martin Schönbeck Beratungen GmbH, Germany.
- Current Version: 5.8.0
- License: GPLv2
- Source: GitHub
- Release: Release
- CUPS implementation: CUPS
- Video showing configuration (a bit outdated): server print plugin
- tested with: 12
Description
- The plugin Beluga Serverprint evolved as a result of the requirement to print shipments and invoices directly from server once on the letterhead and once on blank paper. As usual some requirements were added and some ideas came across.
- Now it's able to create jasper reports with print profiles which depend on the organization, the business partner, the active user, the calling tab and of course the document type. These reports then can be printed in several ways, archived, sent by mail or stored in a directory on the server, for example to pass it over to a DMS.
- The plugin is built without changing the default processes of iDempiere, so it can safely be installed without side effects on the ongoing operation. Visible is only an additional toolbar button next to the regular print button. This button starts the server printing. Without pressing this button iDempiere behaves as before.
Installation
- Simply install it via Felix-Console. You are done.
- German translation is included.
- If you want to print, you will need an implementation of your printing service like this CUPS implementation as well.
This is how to configure it:
Create a copy type
- You first have to create one or more 'copy types', for example "for the customer" or "for the company", which represent the purpose of the result. These entries define any copies created. When starting the printing, serverprint will try to find a valid configuration for each of these copy types. If not found, this copy type won't be produced.

Configure a printer
- If you want to print, you will then have to define the printers. Add a printer provider - the field "Protocol" is used to choose the service implementation. Our CUPS implementation e.g. uses "CUPS". Then run the "Serverprint Printer Lookup" process using the gear in the toolbar.

- Using the "Zoom Across" feature you can take a look at your new printers. In there you can start the process "Lookup Printer Attributes" to gather attributes and their respective values the printer allows for in jobs. (Both of these processes are also part of the service implementation.)

- If you selected to read the attributes automatically like this, they will appear in the tab Printer Attributes and their values in the tab Printer Attribute Values. You may choose to change the Name of either, e.g. if you can't remember what pf-700-a means. You should normally not change the value of Printer Attribute Name, as it likely won't work then. But of course you may enter attributes and attribute values manually if you are sure, your printer accepts them but doesn't deliver them to be automatically inserted.


- After having created the attributes you can combine them to define configurations for your print jobs.


- Now you were able to print on a given printer in a defined fashion. But because different users may want to do the printing on different printers, we need an additional step.
Create a print configuration
- In the print configuration we define a way to print a required result (e.g. printing on letterhead) for different users. You can define one entry for each print configuration as default, so that all users without a special assignment print on that printer.
- As of release 5.7.0: You can add a remote address to identify your client. This allows you to specify which printer to use, e.g. when working from home. Beluga Serverprint will prioritize the more specific configuration (i.e. with an address given) and will fall back on a configuration without a remote address.


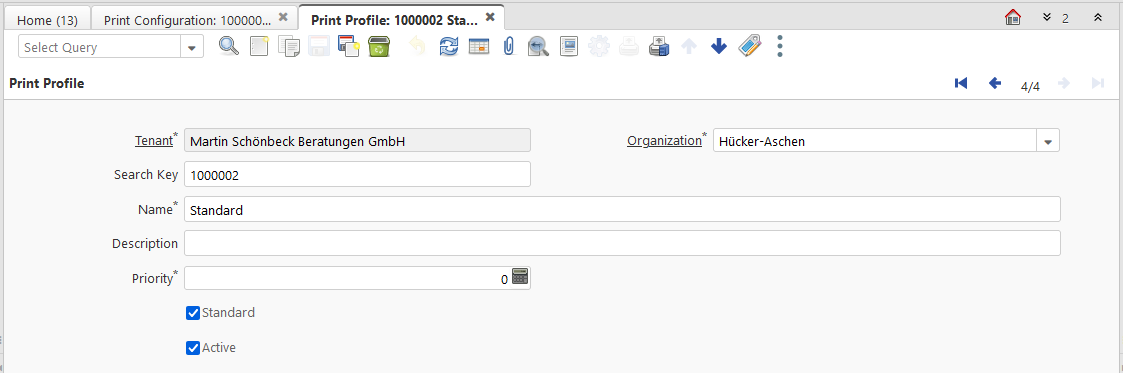
The print profile
- All this is then connected in the print profile. The profile is connected to the organization (or all of them), has a priority and can be labeled as standard.

- The business partner and the user have a new tab allowing to link print profiles. When using serverprint for the business partner or it is being used by the user, these linked profiles and standard profiles are considered, prioritizing non-standard profiles.


- The next level called 'sub print profile' is defined by the tab, the document type or both.

- It collects the 'copies' where the jasper report and the copy type are defined. The jasper report can be called with an additional parameter to for example create with the same report a result once with and once without logo. The parameter is called 'ReportVariant'. You can select output formats other than pdf (default) if e.g. you want to send an order as csv-file via mail to an automatic ordering portal.
- This jasper report together with it's parameter is called only once independently of the number of occurences in different entries. Further more this tab defines what to do with the result of the jasper report.
- The Export Filename Pattern creation of a filename with token replacement, for example `@#Date@`.
- A special case are tokens beginning with $, as these are first looked up in the given record itself, for example `@$documentno@`.
- As an example a common filename pattern is `Invoice_@$documentno@`. The extension is added automatically, thus can be omitted.
Scope: Archiving
- The check mark named 'to archive' is speaking for itself. The document is archived with the record.
- If "to archive" is checked, the field "use from archive" will appear. If that is also checked, the newest document from the record's archive that has the correct extension will be loaded instead of calling the process to create a new document. This way you can ensure to re-send the same document from the first execution every time.
Scope: Printing
- The scope 'Printing' defines which print configuration defined before is to be used and how much copies have to be printed.
- If either no print configuration is given or the number of copies is 0 nothing is printed.
Scope: E-Mail
- The scope E-Mail allows to sent the document via email.
- "Send mail to User" selects the user given in the document (ad_user_id) as a recipient.
- "Mail to fixed address" allows entering a fixed mail address as a recipient.
- A mail template should be selected, otherwise the content and subject of the mail is empty.
- Setting the check mark 'senddirectly' will cause the mail to be sent immediately, otherwise it can be edited before sending.
- The mail configuration of the current user will be used for *From:* if checked, otherwise the information configured in the client setup will be used.
- Beside the document you can add additional attachments by putting them into the attachments of the record. Only attachments whose name starts with one of the prefixes given in the field here are attached.
- Another way to add attachments (as of 5.4.0) is to add attachments to the copy itself. Any time a mail is sent using this copy, its attachments are added to said mail.
- As of 5.8.0: We have added the "MailTo Query" field. This allows you to create and reference a SQL query to return a set of mail addresses.
- Navigate to the window "Serverprint User Queries", either through the menu or by clicking on the field's label.
- Create a query that returns mail addresses. PLEASE NOTE that these queries use the same simple replacement our Export Filename Pattern does. It is not necessarily type-safe and is also in danger of SQL injections. Thoroughly test these queries and only give access to actual administrators.
- Choose the new query in your copy.
- Example: Sending your mail to every contact billing address.
select email
from ad_user u
where c_bpartner_id=@$C_BPartner_ID@
and u.isbillto = 'Y'
Scope: File deposition
- Lastly you can deposit the resulting document in a directory on the server, where it then e.g. can be processed by a DMS or printed by a job from elsewhere.

The report
The copy allows all processes and reports that return a file. If the process does not return a file, serverprint will show an error. However, this behavior is largely untested, which is the reason that the dropdown menu places jasper reports at the top. Others may or may not work as intended.
The printoption
- If you want to group a set of copies together, you can optionally use printoptions. A printoption allows the user at runtime to decide which option - and thereby which set of copies - to use.

- If two or more printoptions (that are not marked "process calls only") are specified for a set of copies and UI is available, a dialog will open.
- This filter is applied **after** any other. First all copies for a copy type are selected, then you may choose between the copy types (if there are multiple).
- This means print options only be evaluated when used in the same sub print profile and for the same copy type!

The process then is as follows:
- Hit the serverprint toolbar button.
- For each defined Copy Type up to one sub print profile will be looked up. This may be a different sub print profile for each Copy Type.
- Looking up the sub print profile is done by searching all print profiles, which match the organization (or all) and either are marked as standard or directly connected with either the business partner (recipient) or the user (sender).
- The profiles are sorted by
- priority first,
- then those not marked as standard over those that are,
- then those with exact matching organization.
- The sub print profile will be ordered
- first by those with matching tab and document type,
- then those without tab but matching the document type,
- lastly those without document type but matching tab.
- Only the first resulting sub print profile for each Copy Type will be used. All entries of those sub print profiles for the selected Copy Type will then be executed.
- A typical usage, for example, would be a standard profile for invoices with one printout "for the customer" and one "for the company" (two copy types). Customer which have to receive the invoice by mail instead will be connected to a profile containing only an entry for the Copy Type "for the customer", which then produces the mail (and voids the corresponding entry in the standard profile).
- If you want to remove a Copy Type which is defined in the standard profile simply create a profile which has an empty copy entry for this Copy Type.
Using it in workflows:
- You can use it in workflows as well.
- The parameter AD_Table_ID is currently only used to archive the document and should be set to the ID of the document's table.
- The AD_Tab_ID is used to identify the required print configuration where it is not defined by the document type. Set it to the correct ID.
- When setting the user remember, that @#AD_User_ID@ is case sensitive.
- The Record_ID is the record ID of the workflow. Since 8.2 it can be overridden by entering a parameter which is not connected to a process parameter and has the Attribute Name 'Record_ID'.
- You can also add parameters to serverprint if you need to. All parameters are then passed to the process which provides the file.
Calls from Java or Scripts
When calling serverprint from code, you have multiple options.
Calling the process
- Create an instance of `de.schoenbeck.serverprint.entry.ServerPrintProcess`.
- Pass it ProcessInfoParameters.
- All of those parameters are also passed to the process specified in the copy to create the document.
- Run the process.
Calling the worker directly
- You can also call the ServerprintWorker directly.
- Create an instance of `de.schoenbeck.serverprint.work.ServerPrintWorker`.
- Use an instance of `de.schoenbeck.serverprint.params.ServerPrintWorkerParamBuilder` to create a set of parameters.
- Pass them to `ServerPrintWorker#prepare`
- Optionally you can create multiple parameter sets.
- If you do, create an array of parameter sets and pass that to `ServerPrintWorker#prepare` instead.
- This way you can create multiple documents that are printed, archived and saved individually, but attached to the same **mail**.
- Execute `ServerPrintWorker#start`.