Plugin: BX Service EDI Generator
- Maintainer: Diego Ruiz - Thomas Bayen - Carlos Ruiz - BX Service GmbH
- Sponsor: BX Service GmbH
- Status: Beta, tested with release 8.2
- License: GPLv2
- Sources: GitHub
Description
This plugin allows you to create an EDI Document File from an iDempiere Document (Only Invoices have been tested).
It does it in a way that it parses values from a specified table. You just need to configure where the data is coming from and which lines you need in your document, and it creates the proper document.
Configuration
Open the EDI Document Type Window to configure an EDI document type.
- Document Name Code: This is the code specifying the document name in the D96A standard, for instance, it is 380 for invoices.
- Message Type: EDIFACT uniform message type. For instance, Invoice = INVOIC
Now open the EDI Format window.
| Field | Description |
|---|---|
| Name | Name of the EDI Format. |
| Description | Description of the EDI Format |
| EDI Document Type | Select which kind of EDI document is this format used for. |
| Table | Table from where the data will be parsed. If you have very complex needs, the recommendation is to create a view to be the data source |
| Line Separator | In EDI Segment separator, how are the segments separated. If left empty, the default value is ' |
| Break Line | If you check the flag, every line will be written in a new line. |
| End Of Line | This is only visible if the break line checkbox is checked. Which encoding do you want to use? Windows or UNIX. |
In the EDI Section tab, you can select all the sections from a standard D96 EDI file.
- Interchange Header
- Message Header
- Message Detail
- Message Summary
- Interchange Trailer
Those lines set on Interchange sections will be added to the file only once, the message section's lines will be added to the document for as many records as needed.
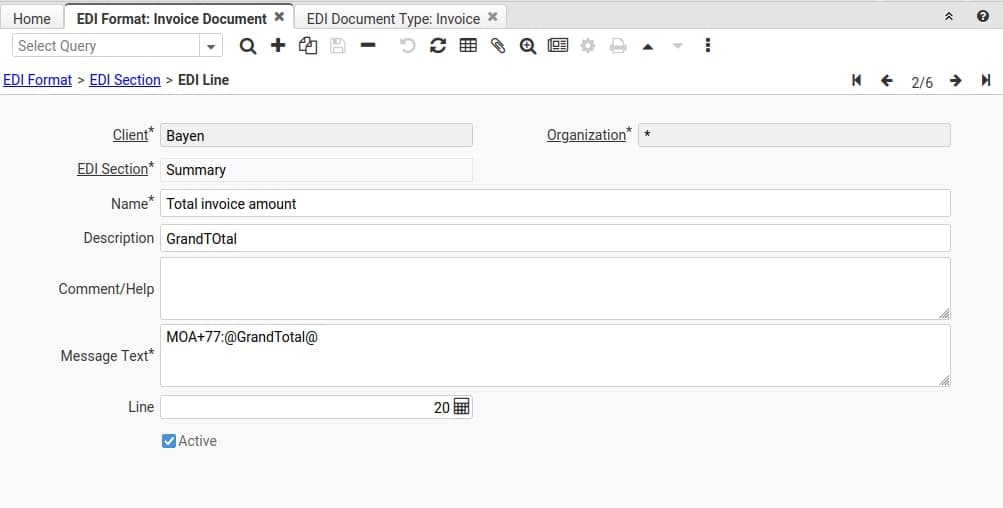
In the EDI Line tab, you can add the message text to be added to each document line. Those values that you want to be parsed by the system must be added with @ as every context variable in iDempiere, you can also add the format to it.
Examples:
- UNH+@EDI_MESSAGE_NUMBER@+@EDI_MESSAGE_TYPE@:D:96A:UN:EAN008
- BGM+380+@DocumentNo@+9
- DTM+137:@DateInvoiced<YYYYMMdd>@:102
Note: Do not add the trailing symbol to the lines, if each line must end with "'", define this in the EDI Format tab as line separator.
There are five EDI specific variables that you can use to be parsed in the document:
| Name | Purpose |
|---|---|
| EDI_BP_SEQ | Defines the sequence number of the EDI file per business partner. It is needed for the UNB and UNZ segment in the EDI notation. |
| EDI_MESSAGE_NUMBER | Defines the message number within the file, it is a consecutive counter for every EDI file. |
| EDI_MESSAGE_TYPE | Defines the message type, this comes from the Message Type defined in the EDI Document Type window. |
| EDI_DOCUMENT_CODE | Defines the document code, this comes from the Message Type defined in the EDI Document Type window. |
| EDI_SEGMENTS_NO | Defines the total of segments in each message, it is usually used in the UNT segments. |
If you want to associate a Business Partner with a specific EDI Format and a document. You can do it in the EDI Business Partner tab. This tab also keeps the EDI sequence number. This is needed if you want to use the Generate EDI Invoices
Usage
You can create an EDI file from two different places.
A single file for a single invoice from the invoice (Customer) window > Generate EDI Document.
Once the EDI Document is created, it is automatically attached to the record.
A single file from several invoices from a Business Partner
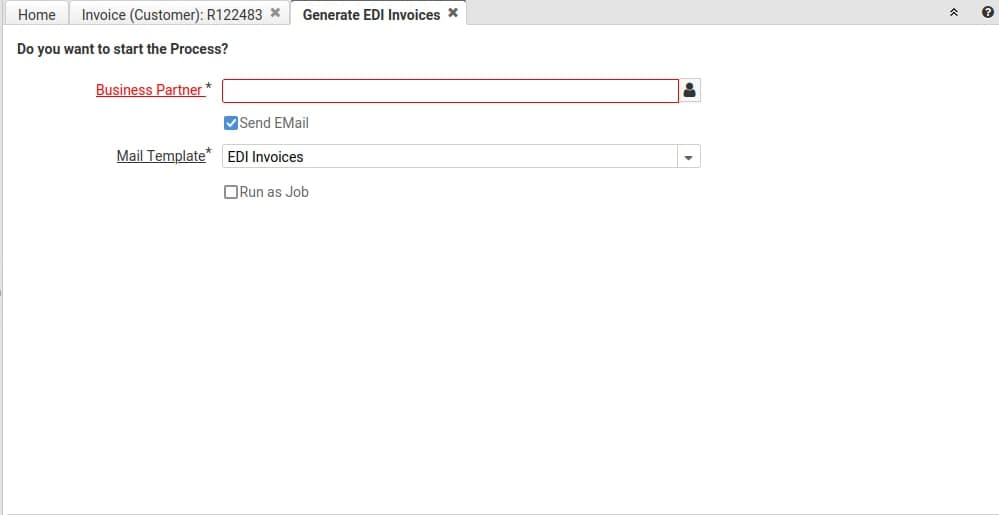
To do this, open the Generate EDI Invoices process and select a Business Partner (It needs to have a valid record in the EDI Busines Partner Tab explained above).
You have two options to get the file.
1) Leave unchecked the Send EMail flag, this will allow you to download the EDI file when the process finishes.
2) Send the EDI file directly to the Business Partner via mail. For this, you need to have a Business Partner with a valid email User. A valid email user is defined as a user with the email field filled and marked as "Invoice To".


