
Application Dictionary - Add Data Relations and Configure the Quick Entry Dialog
Introduction
This tutorial is brought to you by Andreas Sumerauer. If you have any questions, criticism or suggestions for improvement, feel free to join the discussion in the iDempiere google group.
Goal of this tutorial
After finishing this tutorial you will have learned how to add Columns to existing tables. You will be able to connect records from different tables in a useful way. This is done using data relations. Finally you will learn how to create sophisticated user interface elements to manage these relations within iDempiere. As in the previous tutorial we will again only use the iDempiere system user interface to create the additions to the database and the user interface.
Prerequisites
This tutorial builds on Create a Custom Table and Window. Before you start you should have successfully completed that first tutorial.
- Some knowledge of the basic concepts of relational data bases will be beneficial but is not required.
- You can greatly improve your learning experience through actively reproducing the steps given here.
The customizations added during the course of the previous lesson are required for doing that.
Example Specification
To complete the example specification from the last tutorial we still need to create a data relation between the new Office Room table and the factory provided Business Partner table. This table holds the data of all the persons that our client's organizations are interacting with.
- That relation will be built through a new Office Room column that we are going to add to the Business Partner table together with a so called foreign key constraint that serves to keep the data consistent through any data changes that concern the newly defined relation.
(Note that in iDempiere also an employee of the organization is a Business Partner.) - On the user interface side we are going to add a new Office Room field to the Business Partner window.
- As a last step we are going to configure iDempiere's QuickEdit dialog. This will allow us to add or modify an employee's office room without having to switch away from the Business Partner window to the Office Room window.
Conventions
- This tutorial uses a numbered list whenever there are steps that need to be executed to implement the specified requirements.
- A bulleted list will be used for hints, explanations and background information.
Steps
Add Database Elements

Add a new Column to the Business Partner Table
Now it is time to create the relation from the existing database to the new Office Room table.
- Open the Table & Columnn window and load the AD_User table.
- Click the Create New Button ('+' icon) in the Column tab tool bar to open the Table > Column window with a new record.
- In the Element field enter SB_OfficeRoomID. Remember that this Element was generated when we created the Office Room table in the previous tutorial.
You will find that a number of fields have been autofilled.
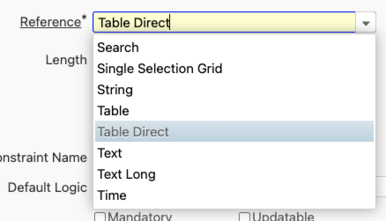
Note that the System has entered the value Table Direct into the Relation field.
Idempiere comes with a number of predefined relations to choose from. You can scroll through the Reference dropdown list to see all of them. The selected reference lets iDempiere know how to handle the data stored in the table column.
It will determine:
- The column's data type in the database and in the application
- How the Data is presented to the user.
- The UI elements that are presented to the user for manipulation and management of the stored data.

- You can try and explore some different reference types by selecting them from the dropdown. You will find that the layout of the Column window adapts to show special properties that are relevant to the selection.
- Now return to the initial selection of Table Direct.
Configure the Data Relation established by the new Column
- Let's have a closer look at the Constraint Type field. Check out the choices presented through the dropdown list.
The constraint type determines how the database will behave when a the record referenced by the field is deleted: If the user or some process tries to delete an Office room that is still referenced by some Business Partner record we need to take some action to preserve the consistency of our data. Otherwise we might end up with a dangling reference in the Business Partner record.
- No Action: This is the default. If there are any child records (i .e. any users referencing a room) then the database engine will not delete the record. Instead an error message will be produced whenever the user tries to delete that room.
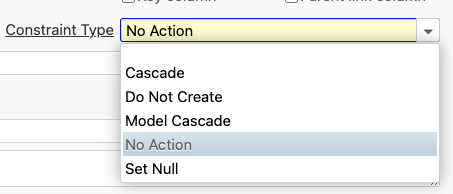
- Do Not Create: No constraint is created for this column. This is not recommended! Going without a constraint can lead to data errors, the parent can be deleted without any notice leaving orphan children in the database.
- Cascade: When the parent record is deleted then the child records on this constraint will be deleted too (if possible) - this constraint is executed in the database, consequently the business model rules are not triggered (workflows, changelog, etc)
- Model Cascade: When the parent record is deleted then the child records on this constraint will be deleted too (if possible) - this constraint is executed within iDempiere, so all business model rules are applied.
- Set Null: When the parent record is deleted then the child records on this constraint will set to null (if possible)

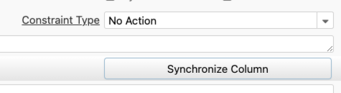
- Set the Constraint Type field back to the default value No Action and save the new record.
- Hit the Synchronize Button and confirm the process dialog with OK to generate the new column in the database.


A confirmation dialog will appear when the process has been completed. In the upper section of the dialog you will find the SQL commands that the application has sent to the database engine. The lower section shows the response from the database which should basically be just an exact echo of the commands given above. This indicates that the commands were executed without errors.
- Hit OK to close the dialog and you are done.
Add the User Interface Elements
Add a new field to a factory provided window.
We are now going to add a new Office Room field to the 'Business Partner > Business Partner' window tab.
- Go up one tab level to the Table view. To do that click Table in the breadcrumbs bar or hit ALT + Arrow UP on the keyboard.
- Now click the Label of the Window field to zoom over to that window.
- In the business partner window switch to the Business Partner subtab by hitting the Edit Record button in the subtab row. (Or hit ALT + Arrow Down on the keyboard.)
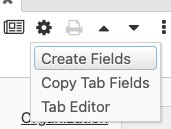
- Now click the Process button in the icon bar and select Create Fields from the context menu. The Create Fields process dialog will appear.
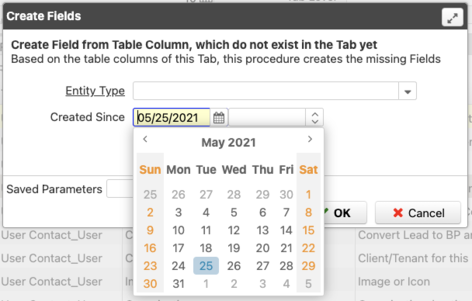


When adding fields to a factory provided window it is always a good idea to restrict the number of fields that are created by the process. Many tables include columns that purposefully do not have a corresponding field in the edit window. We need to ensure that we do not generate fields for these columns too.
- We will avoid inadvertently creating fields for those columns by entering today's date in the date field. This will exclude any columns from the process that have been created earlier by somebody else.
- Now hit OK. A confirmation dialog will appear that lists the newly created fields.
Configure the Window Layout
- We are again using the Tab editor to adapt the window layout. Open the editor through the context menu of the Process button.
- In the editor you will find the new Office Room editor field at the bottom of the page. Drag and drop it to a more convenient position.
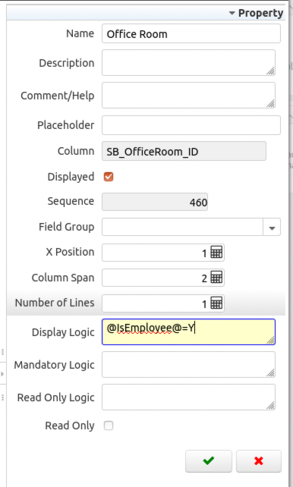
With regards to our specification it does not make sense to assign a room to a business partner that is not also an employee. We can guide our users by only showing the new field when the Employee checkbox is ticked.
- With the focus still on the Office Room field enter '@IsEmployee@=Y' into the Display Logic field in the Property sidebar to the right of the edit area.

Side Note - The iDempiere Context
What actually have we done here? To understand the meaning of the arcane text we have just entered it is necessary to dig a bit deeper and learn a bit about the iDempiere context.
- iDempiere makes all field values of the current window (among many other things) available as so called context variables. Each time the user enters a new value into field its corresponding variable in the iDempiere context will be updated immediately.
- The iDempiere context is just a long list of values. Each of these values is paired with a key that is needed to identify that value.
- To access a context value from the Display Logic field we just have to surround its key name with @ symbols.
The application will then replace the codified key name with the respective context value and then check wether the resulting statement is true or not. The value of the Display Logic checkbox is 'Y' when it is ticked and 'N' when not. So when we write '@IsEmployee@=Y' iDempiere will replace the '@IsEmployee@' part with a 'Y' when the checkbox is ticked. The statement will then be 'Y=Y'. This is obviously true and because of that the Office Room field will be shown. Unticking the box changes the statement to 'N=Y' which is false and the field will be hidden.
Configure the Office Room Identifier String
ToDo
Make selected Fields available to the Quick Entry Dialog
As a last step we are now going to make a few of the fields in the Office Room window available to the Quick Entry dialog. We have already used that dialog in the previous tutorial when we created the entity types for our custom columns. Remember that we did not switch to the entity type window to do that. Instead we opened the context menu of the Entity Type field and selected New to bring up the quick entry dialog. We then were able to create the new types using that dialog.
- ToDo:Switch to Window, Tab and Field: Office Room
- In the Field subtab select the Room Number row and click the Edit Record button.
- Tick the Quick Entry checkbox in the Window > Tab > Field view that the window that has switched to. This makes the field available to the QuickEntry dialog.
Repeat that last step for both the Floor Number and Building Wing fields.
Hint: Do not forget to save your last edit. iDempiere will autosave any of your changes when you load another record into the active window or switch to a parent tab or subtab.
Manual saving is required in all other cases. That is when you change the focus to any other tab in the hierarchy that is not a parent or child of the previous one.
Conclusion
Todo: List UI customization elements: new field in existing Window, QuickEntry Dialog enabled for new Element. Todo: Login as client admin or user Todo: Description Office Room Field in Business Partner Window Todo: Usage QuickEntry