Adding a Field to an existing Window
This guide shows you how to add fields to an existing window without writing code or connecting to the database. You will also learn about Entity Types and System Elements.
It is based on this video by Jan Thielemann from Evenos.
How to do it
Getting ready
Before you start, you must identify the underlying system elements that are used by the Window and its Tabs and Fields so that you can add your field correctly:
- Login as a conventional application user such as GardenAdmin/GardenWorld
- Open the Window that you are interested in, for example Sales Order
- Click on the Help button (blue button '?' top left) or Alt+H and make a note of the names of the Window and Tab where you want to display the new field
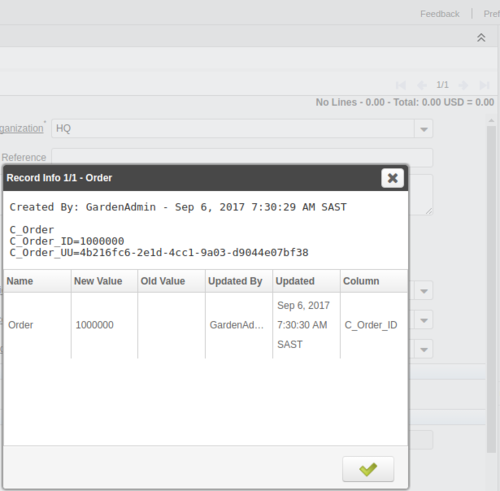
- Now click on the Record Info field on the top right of the record, next to the Next Record icon. It will read something like 1/8. Make sure that there is data in the window because the Record Info does not display on a blank Create New window (create dummy data if necessary)
- Make a note of the name of the table in the Record Info pop-up window (in this example, it is c_order):
Table and Columns
Now that you have the name of the table, you can add a new column:
- Login as SuperUser/System (you can only change underlying elements from the System client)
- Click on Table and Column (should be in the Favourites window on the left, otherwise use the Search window to find it)
- Search for the table that you identified above
- Click on the Column tab beneath the table and create a new column (click on New or Shift+Alt+N)
- The first mandatory field to be entered is System Element. Since this a new field, you must create a new System Element forit, so click on the field label 'System Element' to open the Elements window
- Create a new Element to hold the basic details of the field:
- Client: System
- Organisation: *
- DB Column Name: name of the database column (give it an identifiable prefix so that you can locate it easily in the database)
- Name: the field label
- Print name: the name of the field that you would like see on a printout (usually the same as the Name)
- Description: sensible description
- Comment/Help: useful business-related text (to assist the user understand what the field means in the context of the business)
- Entity type: User maintained (to protect it from upgrades)
- Save the Element
- Now enter the rest of the new column details:
- System Element: the name of the Element that you created above (note that this will fill out the Description and Help automatically from the Element but you can change it if necessary)
- Length: change the field length
- Reference: the type of column (usually Number or Text)
- change other fields as required
- Save the new column
At this stage the column is just defined in the Application Dictionary, so now add it to the underlying database:
- Click on Synchronize Column
- Click on OK in the pop-up window to confirm that you want to update the database
- Verify that the database was altered correctly.
Window, Tab & Field
The new field has been created as a new column in the database and registered in the Application Dictionary, so now you can add it to a Window:
- Select Window, Tab & Field in the Favourites window (make sure you are still logged in as SuperUser/System)
- Search for the Window that you want to update, 'Sales Order' for example
- Select the Tab that will hold the new field (in the Tab beneath the Window record)
- Click on the Edit button to open a new Window to edit the Tab
- In the new Window, click on the Process button (the Gear icon) in the toolbar and select Create Fields. This will create the missing Fields based on the table columns
- Click on OK in the pop-up window to confirm that you want to create the fields that do not exist in the Tab yet. It will add the field to end of the list of fields beneath the Tab record
- Click on the Process icon again and select the Tab Editor. This will open the Tab Editor which allows you to add the new field (it will be in the list of Visible Fields on the left)
- Grab the field using the field label and drag it to the required position
- Change the Column Span and Number of Lines as appropriate
- Click on the Save icon when you are done
You can now change roles to an application user role and open the Window to see the new field.
Watch the video for more details about creating a Field Group and how to use the Tab Editor.

