
Help:PGAdmin4 with python
<html xmlns:o="urn:schemas-microsoft-com:office:office" xmlns:w="urn:schemas-microsoft-com:office:word" xmlns:m="http://schemas.microsoft.com/office/2004/12/omml" xmlns="http://www.w3.org/TR/REC-html40">
<head> <meta name=Title content=""> <meta http-equiv=Content-Type content="text/html; charset=macintosh"> <meta name=ProgId content=Word.Document> <meta name=Generator content="Microsoft Word 15"> <meta name=Originator content="Microsoft Word 15"> <link rel=File-List href="UBUNTU%2016.04%20-%20PGAdmin4%20with%20python%20.fld/filelist.xml"> <link rel=themeData href="UBUNTU%2016.04%20-%20PGAdmin4%20with%20python%20.fld/themedata.thmx"> <style> </style> </head>
<body bgcolor=white lang=ES-TRAD link=blue vlink="#954F72" style='tab-interval: 35.45pt'>
PGADMIN4 ON UBUNTU 16.04<o:p></o:p>
<![if !supportLists]>1. <![endif]>Install<o:p></o:p>
<![if !supportLists]>2. <![endif]>Allow Remote Access<o:p></o:p>
<![if !supportLists]>3. <![endif]>Run as a Service<o:p></o:p>
<![if !supportLists]>4. <![endif]>Access PGAdmin 4<o:p></o:p>
<![if !supportLists]>5. <![endif]>Enable Postgresql remote Access<o:p></o:p>
<o:p> </o:p>
<![if !supportLists]>1. <![endif]>Install dependencies, create a virtual environment, download, install & configure<o:p></o:p>
Using Python2.x<o:p></o:p>
sudo apt-get install virtualenv python-pip libpq-dev python-dev<o:p></o:p>
<o:p> </o:p>
cd<o:p></o:p>
virtualenv pgadmin4<o:p></o:p>
cd pgadmin4<o:p></o:p>
source bin/activate<o:p></o:p>
<o:p> </o:p>
pip install https://ftp.postgresql.org/pub/pgadmin/pgadmin4/v2.1/pip/pgadmin4-2.1-py2.py3-none-any.whl<o:p></o:p>
sudo apt-get install virtualenv python3-pip libpq-dev python3-dev<o:p></o:p>
<o:p> </o:p>
cd<o:p></o:p>
virtualenv -p python3 pgadmin4<o:p></o:p>
cd pgadmin4<o:p></o:p>
source bin/activate<o:p></o:p>
<o:p> </o:p>
pip3 install https://ftp.postgresql.org/pub/pgadmin/pgadmin4/v2.1/pip/pgadmin4-2.1-py2.py3-none-any.whl<o:p></o:p>
Configure<o:p></o:p>
Override default paths and set it to single-user mode in the <a href="https://www.pgadmin.org/docs/pgadmin4/dev/server_deployment.html">local configuration file</a>:<o:p></o:p>
nano lib/python2.7/site-packages/pgadmin4/config_local.py<o:p></o:p>
For Python3.x:<o:p></o:p>
nano lib/python3.x/site-packages/pgadmin4/config_local.py<o:p></o:p>
Write:<o:p></o:p>
import os<o:p></o:p>
DATA_DIR = os.path.realpath(os.path.expanduser(u'~/.pgadmin/'))<o:p></o:p>
LOG_FILE = os.path.join(DATA_DIR, 'pgadmin4.log')<o:p></o:p>
SQLITE_PATH = os.path.join(DATA_DIR, 'pgadmin4.db')<o:p></o:p>
SESSION_DB_PATH = os.path.join(DATA_DIR, 'sessions')<o:p></o:p>
STORAGE_DIR = os.path.join(DATA_DIR, 'storage')<o:p></o:p>
SERVER_MODE = False<o:p></o:p>
Run<o:p></o:p>
python lib/python2.7/site-packages/pgadmin4/pgAdmin4.py<o:p></o:p>
For Python3.x:<o:p></o:p>
python3 lib/python3.x/site-packages/pgadmin4/pgAdmin4.py<o:p></o:p>
Access<o:p></o:p>
Access at <a href="http://localhost:5050/">http://localhost:5050</a><o:p></o:p>
Exit<o:p></o:p>
Exit with Ctrl-C<o:p></o:p>
Run again<o:p></o:p>
cd ~/pgadmin4<o:p></o:p>
source bin/activate<o:p></o:p>
python lib/python2.7/site-packages/pgadmin4/pgAdmin4.py<o:p></o:p>
For Python3.x<o:p></o:p>
#!/bin/bash<o:p></o:p>
cd ~/pgadmin4<o:p></o:p>
source bin/activate<o:p></o:p>
python3 lib/python3.x/site-packages/pgadmin4/pgAdmin4.py<o:p></o:p>
Make a shortcut<o:p></o:p>
touch ~/pgadmin4/pgadmin4<o:p></o:p>
chmod +x ~/pgadmin4/pgadmin4<o:p></o:p>
nano ~/pgadmin4/pgadmin4<o:p></o:p>
Write:<o:p></o:p>
#!/bin/bash<o:p></o:p>
cd ~/pgadmin4<o:p></o:p>
source bin/activate<o:p></o:p>
python lib/python2.7/site-packages/pgadmin4/pgAdmin4.py<o:p></o:p>
For Python3.x<o:p></o:p>
#!/bin/bash<o:p></o:p>
cd ~/pgadmin4<o:p></o:p>
source bin/activate<o:p></o:p>
python3 lib/python3.x/site-packages/pgadmin4/pgAdmin4.py<o:p></o:p>
Now you can just run it with a simpler command:<o:p></o:p>
~/pgadmin4/pgadmin4<o:p></o:p>
Python3 users<o:p></o:p>
Replace [x] in Python3.x with your respective version.<o:p></o:p>
Conflict with pgAdmin 3 configuration<o:p></o:p>
pgAdmin 4 will not start in the environment where pgAdmin 3 was previously installed and used because of incompatible configuration in the .pgadmin directory. The simplest solution is to either clear that directory or tweak config_local.py to point to a clean new .pgadmin4directory.<o:p></o:p>
<o:p> </o:p>
<![if !supportLists]>2. <![endif]>REMOTE ACCESS (For CLOUD Install)<o:p></o:p>
PGAdmin4 Folder: ~/pgadmin4/lib/python3.X/site-packages/pgadmin4<o:p></o:p>
(Replace 3.X with your Python Version)<o:p></o:p>
You need to add below config options,<o:p></o:p>
DEFAULT_SERVER = '0.0.0.0'<o:p></o:p>
in config_local.py (in "pgAdmin4" folder).<o:p></o:p>
If also want to change default port then also add<o:p></o:p>
DEFAULT_SERVER_PORT = 5050<o:p></o:p>
<o:p> </o:p>
<o:p> </o:p>
<![if !supportLists]>3. <![endif]>RUN as a Service<o:p></o:p>
Python file: ~/pgadmin4/lib/python3.x/site-packages/pgadmin4/pgAdmin4.py<o:p></o:p>
PGAdmin4 Folder: ~/pgadmin4/lib/python3.X/site-packages/pgadmin4<o:p></o:p>
(Replace 3.X with your Python Version)<o:p></o:p>
Before we start letÕs exit the virtual enviroment using the follwoing command:<o:p></o:p>
# deactivate<o:p></o:p>
Ð To make PgAdmin 4 we need to make some extra modification, Open the pgAdmin4.py file and insert the following line in the begin of the file:<o:p></o:p>
# vi ~/pgadmin4/lib/python3.x/site-packages/pgadmin4/pgAdmin4.py<o:p></o:p>
#!/usr/bin/env python3<o:p></o:p>
[...]<o:p></o:p>
Ð Make it executable by doing:<o:p></o:p>
# chmod +x ~/pgadmin4/lib/python3.x/site-packages/pgadmin4/pgAdmin4.py<o:p></o:p>
Ð Now create a /etc/systemd/system/pgadmin4.service service file containing:<o:p></o:p>
# vi /etc/systemd/system/pgadmin4.service<o:p></o:p>
[Unit]<o:p></o:p>
Description=Pgadmin4 Service<o:p></o:p>
After=network.target<o:p></o:p>
<o:p> </o:p>
[Service]<o:p></o:p>
User=root<o:p></o:p>
Group=root<o:p></o:p>
# Point to the virtual environment directory<o:p></o:p>
WorkingDirectory=/root/pgadmin4<o:p></o:p>
# Point to the bin folder of your virtual environment<o:p></o:p>
# Environment="PATH=/home/qgis/Downloads/pgadmin4/bin"<o:p></o:p>
Environment="PATH=/root/pgadmin4/bin"<o:p></o:p>
# ExecStart=/home/qgis/Downloads/pgadmin4/bin/python /home/web/Downloads/pgadmin4/lib/python3.6/site-packages/pgadmin4/pgAdmin4.py<o:p></o:p>
ExecStart="/root/pgadmin4/lib/python3.5/site-packages/pgadmin4/pgAdmin4.py"<o:p></o:p>
PrivateTmp=true<o:p></o:p>
<o:p> </o:p>
[Install]<o:p></o:p>
WantedBy=multi-user.target<o:p></o:p>
Ð Enable and start PgAdmin Service at system boot:<o:p></o:p>
# sudo systemctl daemon-reload<o:p></o:p>
# sudo systemctl enable pgadmin4<o:p></o:p>
# sudo systemctl start pgadmin4<o:p></o:p>
# sudo systemctl status pgadmin4<o:p></o:p>
<o:p> </o:p>
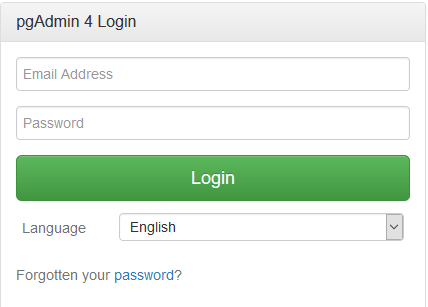
<![if !supportLists]>4. <![endif]>Access PGAdmin 4<o:p></o:p>
Ð Open http://Server_ip:5050 and logon to the PgAdmin using your credentials.<o:p></o:p>
<o:p> </o:p>
<o:p> </o:p>
<![if !supportLists]>5. <![endif]>Enable Postgresql Remote Access.<o:p></o:p>
<o:p> </o:p>
5.1. Permitir conexiones de clientes desde un determinado rango<o:p></o:p>
Llegamos a uno de los puntos importantes de la cuesti—n, el fichero pg_hba.conf. Su situaci—n exacta depender‡ de vuestra instalaci—n, pero lo encontrarŽis en una de estas dos rutas:<o:p></o:p>
- /var/lib/pgsql/data/pg_hba.conf (en mi instalaci—n lo tengo ah’, utilizo <a href="http://es.wikipedia.org/wiki/Scientific_Linux" target="_blank">Scientific Linux</a>, una distribuci—n derivada de <a href="http://es.wikipedia.org/wiki/Red_Hat_Enterprise_Linux" target="_blank">Red Hat</a>)<o:p></o:p>
- /etc/postgresql/main/pg_hba.conf<o:p></o:p>
Dentro de este fichero, al final del mismo, veremos algo as’:<o:p></o:p>
|
1<o:p></o:p> 2<o:p></o:p> 3<o:p></o:p> 4<o:p></o:p> 5<o:p></o:p> 6<o:p></o:p> 7<o:p></o:p> 8<o:p></o:p> |
# TYPE DATABASE USER CIDR-ADDRESS METHOD<o:p></o:p> <o:p></o:p> # "local" is for Unix domain socket connections only<o:p></o:p> local all all ident<o:p></o:p> # IPv4 local connections:<o:p></o:p> host all all 127.0.0.1/32 ident<o:p></o:p> # IPv6 local connections:<o:p></o:p> host all all ::1/128 password<o:p></o:p> |
ÀQuŽ significa esto? Veamos columna a columna:<o:p></o:p>
- Tipo: b‡sicamente conexi—n local o conexi—n remota (host).<o:p></o:p>
- Base de datos: base de datos a las que afecta la regla. Si queremos todas, usamos el comod’n all.<o:p></o:p>
- Usuario: usuarios a los que afecta la regla, si queremos que afecte a todos, usamos tambiŽn all.<o:p></o:p>
Nos paramos ahora en los dos apartados que m‡s atenci—n requieren.<o:p></o:p>
5.2. Direcci—n<o:p></o:p>
En esta columna definimos, las direcciones IP (podemos tambiŽn usar IPv6), desde las que podremos conectarnos a PostgreSQL. Usaremos la f—rmula direcci—n/m‡scara:<o:p></o:p>
- Una sola direcci—n: 150.100.100.100/32<o:p></o:p>
- O un rango (ampliemos el mismo de antes): 150.100.100.0/24 (256 direcciones)<o:p></o:p>
5.3. MŽtodo<o:p></o:p>
Aunque hay <a href="http://www.postgresql.org/docs/8.2/static/auth-pg-hba-conf.html" target="_blank">multitud de mŽtodos para utilizar</a> (incluyendo conexiones <a href="http://es.wikipedia.org/wiki/LDAP" target="_blank">LDAP</a>, <a href="http://es.wikipedia.org/wiki/Kerberos" target="_blank">Kerberos </a>o <a href="http://es.wikipedia.org/wiki/Pluggable_Authentication_Modules" target="_blank">PAM</a>), explico los tres m‡s b‡sicos:<o:p></o:p>
- ident: utiliza el usuario del sistema desde el que se est‡ intentado conectar.<o:p></o:p>
- trust: deja todos los accesos sin necesidad de autenticarse (s—lo recomendable para conexiones desde el equipo local).<o:p></o:p>
- password: identificaci—n con usuario/contrase–a, es la m‡s t’pica y es la recomendable para conexiones desde clientes como <a href="http://www.sqlmanager.net/products/postgresql/manager" target="_blank">EMS PostgreSQL Manager</a>.<o:p></o:p>
Una l’nea de ejemplo, para darle acceso a todos los usuarios, a todas las base de datos, desde el rango de IP explicado antes, usando autenticaci—n con usuario y contrase–a, ser’a la siguiente:<o:p></o:p>
|
1<o:p></o:p> |
host all all 150.100.100.0/24 password<o:p></o:p> |
5.4. Habilitar conexiones al socket desde clientes que no sean el host local<o:p></o:p>
Al igual que en MySQL hay que configurar el <a href="http://dev.mysql.com/doc/refman/5.5/en/can-not-connect-to-server.html" target="_blank">bind-adress</a> en my.conf, en PostgreSQL tenemos que hacer algo an‡logo.<o:p></o:p>
Para versiones 8.x en adelante el procedimiento es el siguiente. Buscamos el ficheropostgresql.conf en:<o:p></o:p>
- /var/lib/pgsql/data/postgresql.conf<o:p></o:p>
- /etc/postgresql/8.2/main/postgresql.conf<o:p></o:p>
Y buscar dentro del mismo la siguiente l’nea:<o:p></o:p>
|
1<o:p></o:p> |
listen_addresses='localhost'<o:p></o:p> |
Para sustituirla, por el comod’n (para todas las IP, es una opci—n segura, tened en cuenta que tenemos tambiŽn un filtro en el fichero pg_hba.conf.<o:p></o:p>
|
1<o:p></o:p> |
listen_addresses='*'<o:p></o:p> |
O definir algunas direcciones IP en concreto:<o:p></o:p>
|
1<o:p></o:p> |
listen_addresses='150.100.100.100 150.100.100.101'<o:p></o:p> |
5.5. Reiniciar servicio<o:p></o:p>
Reiniciamos el servicio para que el servidor cargue los nuevos valores (como root):<o:p></o:p>
|
1<o:p></o:p> |
$ service postgresql restart<o:p></o:p> |
<a
href="http://yallalabs.com/wp-content/uploads/2017/07/How-to-Install-pgAdmin-4-in-Server-mode-on-Ubuntu-16-LTS_1.png">
</a><o:p></o:p>
<o:p> </o:p>
</body>
</html>