Developing iDempiere: Create a new custom class model with window and tabs
Introduction
iDempiere can be extended by creating new class models for specific business requirements without editing code in the trunk so that your bespoke development can be protected from system upgrades.
This how-to shows you how to create a master-detail class model and a window with tabs and fields to create, update and delete data using the built-in functionality of iDempiere.
You can check this video by Jan Thielemann from evenos GmbH.
The process is as follows:
- Create the Table and Column records in the iDempiere dictionary;
- Create a Window and Tab for the master table, with a sub-tab for the detail table;
- Create a Menu entry to be able to see the Window;
- Build a plug-in so that the new functionality can be deployed with the base application.
Prerequisites
The tutorial assumes that you have set up iDempiere in an Eclipse development environment. If you have not, follow these instructions for installing iDempiere for Development.
Table and Columns
Login as SuperUser
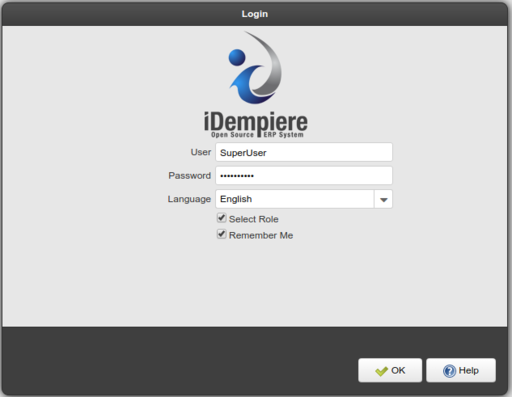
The window for the new class models is created by configuring iDempiere to use the new tables, using the SuperUser login and System client, so browse to http://localhost:8080/webui/ and login as SuperUser and check the Select Role box:
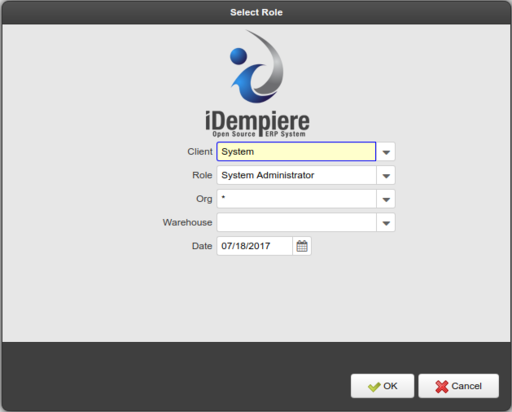
Make sure the Client is System and the Role is System Administrator:
Create the Table and Columns
After login, open the Table and Column window:
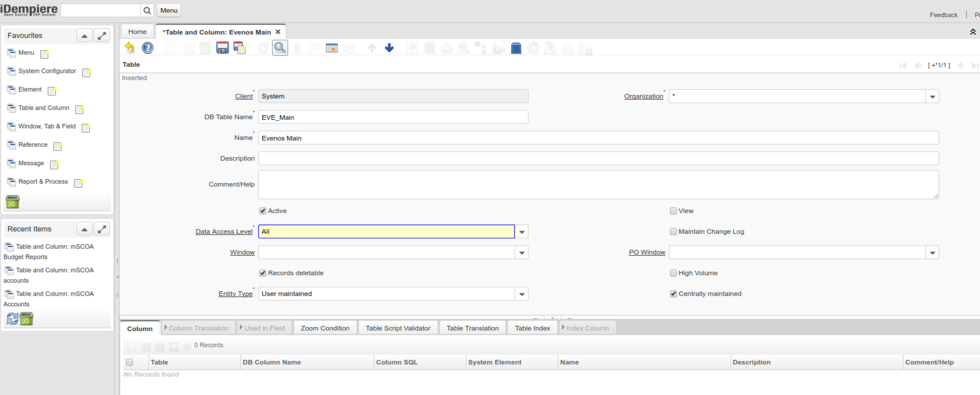
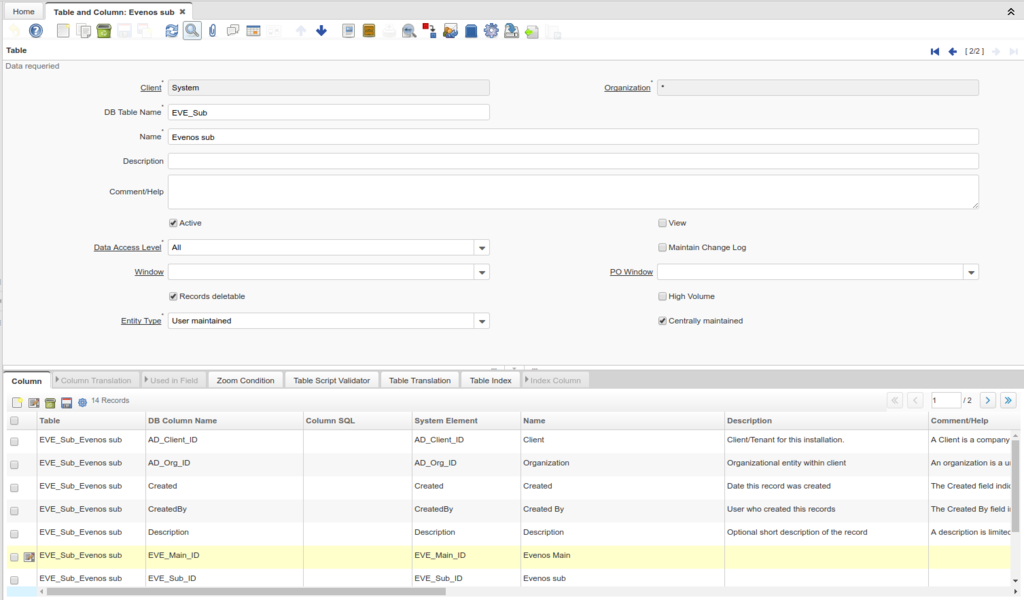
Create the Table by entering the parent database table in the DB Table Name field:
Note:
- It is recommended that you use a prefix for your custom tables, so it is easier to identify in the future what belongs to the core and what is a customization.
- the prefix and the table name have been capitalized so that when we build the plug-in, the iDempiere Model Generator generates Java classes with names that conform to the standard naming convention;
- the Entity Type is 'User maintained' to specify that the table is a custom one. You can use your own entity type here as well
See the Table and Column documentation for the usage of the other table attributes: Template:Table and Column (Window ID-100 V1.0.0)#TAB:_Table
Now navigate to the Column Tab and create the corresponding columns. iDempiere has columns that must always be included in order to work properly in the system.
- TableName_id: the primary key of the table, named by adding the suffix _id to the table name;
- TableName_uu: a unique identifier, named by adding the suffix _uu to the table name;
- AD_Client_ID: the identifier of the client or tenant;
- AD_Org_ID: the identifier of the organisational unit within the client;
- IsActive: records can be deactivated to allow for logical deletes;
- Created: the date this record was created;
- CreatedBy: the user that created the record;
- Updated: the date this record was updated;
- UpdatedBy: the user that updated the record.
To make your life easier, you can use the "Copy columns from Table" process, and copy the columns from M_FreightCategory, this will create all the columns that are needed (including _ID and _UU), you can delete the ones you don't want.
Now you have the new Table and Columns to work with:
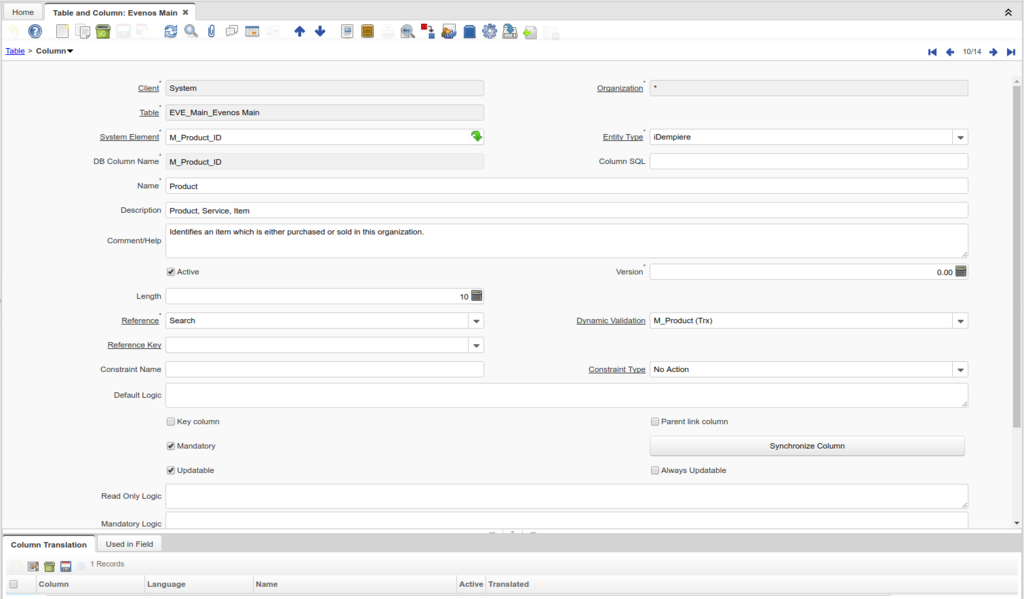
Scroll through the Columns listed in the grid below and change their properties as required by the application. As an example, click on the Edit button on the left of the record for M_Product_ID to open up the details of the column:
Note that M_Product_ID is already in the system dictionary because it is a column in the table M_Product so some of the column attributes are already populated.
See the Table and Column documentation for the usage of each of the other Column attributes: Template:Table and Column (Window ID-100 V1.0.0)#TAB:_Column. The video has a detailed discussion of all the various Column attributes.
After changing all the columns accordingly to your needs, click on Synchronize Column.
This will create the table and columns in the database.
Now repeat the steps mentioned above to create a Table entry for the detail table with its corresponding columns:
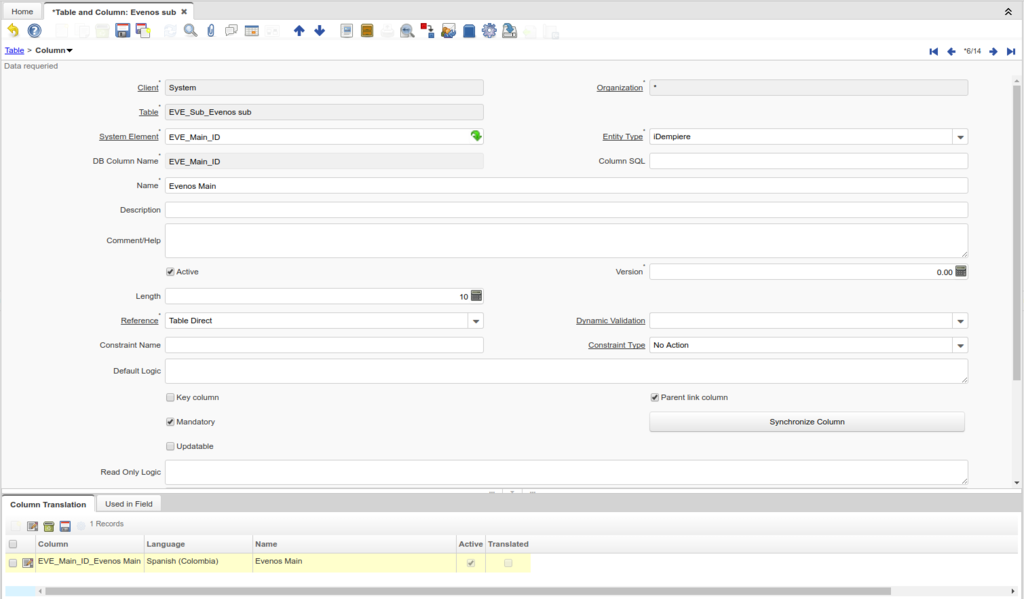
We must link the child table to its parent, using the column EVE_Main_ID, so select it and open it, then check the Parent link column attribute and save the change to the column:
Window and Tabs
We have created the dictionary entries for the two tables, so now we can create the window and tab for the parent EVE_Main and a sub-tab for the child EVE_Sub.
Create Window
Since iDempiere 8.2, you can create the window record automatically using the NF8.2 Create Window From Table process from the toolbar. If you are using an older version of iDempiere, you need to create those records manually. Please make sure you check the Create Menu flag.
Create Detail Tab
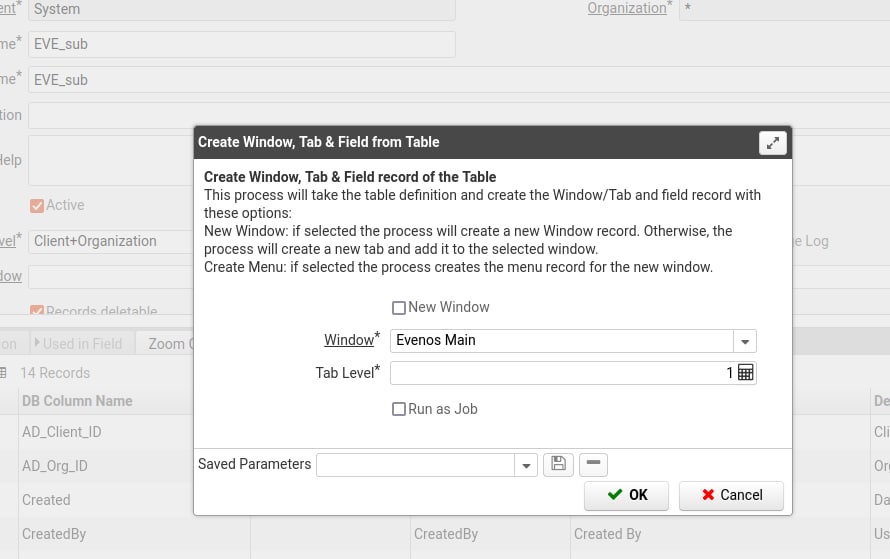
Navigate to the detail table (EVE_Sub) and run the NF8.2 Create Window From Table process. Unchecked the New Window flag, select the window created in the step above and set a tab level = 1.
You can navigate to the newly created Tab record and see al the created fields.
You can click on the Field Sequence tab to adjust the field ordering.
Click on the cog in the toolbar to open a graphical editor to edit the layout of the fields:
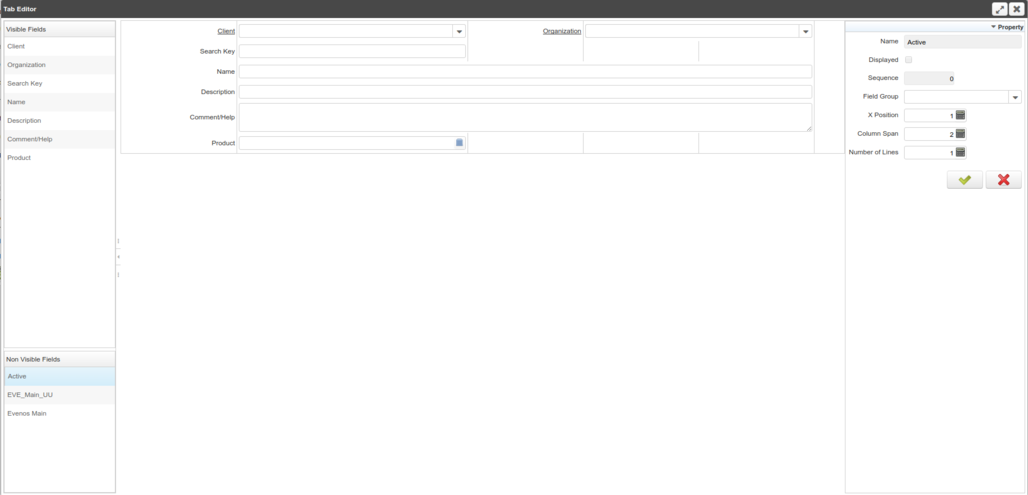
The NF1.0 TabEditor will open in a new window where you can add and remove fields, drag them around (by grabbing the field title), resize them (by double-clicking with and without holding down CTRL), and so on:
Watch the video for a demonstration of the Tab Editor.
Menu
If you checked the Create Menu flag in the NF8.2 Create Window From Table process dialog you don't need to do anything else. Otherwise you need to open the Menu window and create the record manually.
Log out and log in again to see the new entry in the Menu tree:
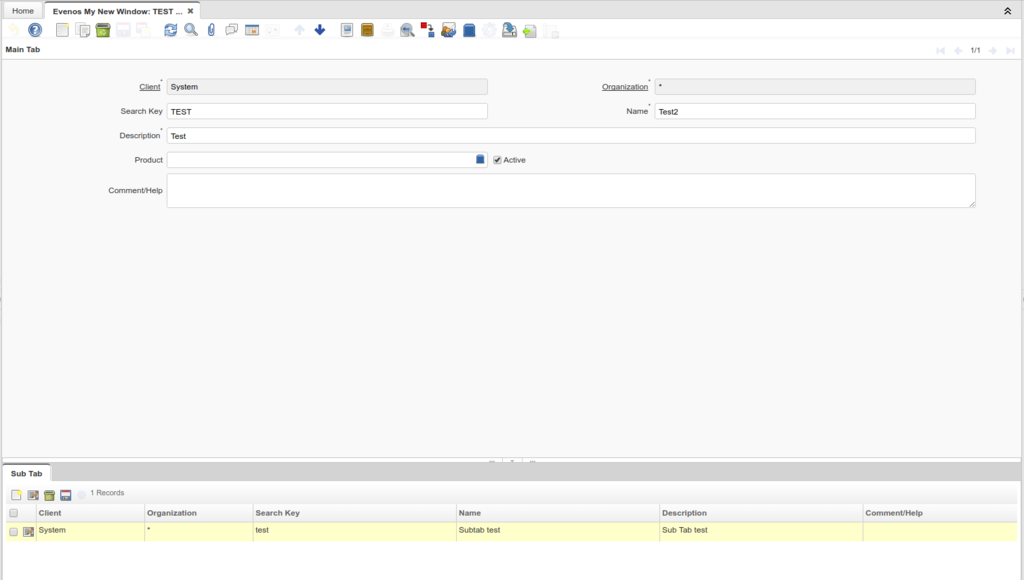
Click on the new menu entry to see the new window with its main tab and the sub-tab below:
Watch the video and test the new window.
Plug-in
At this point the new model is only available in the development environment, and it is implemented using default mechanisms that contain no Business logic. We need to build a plug-in to hold the new model, together with any bespoke logic that may be required, so that it can be deployed with the base system.
You can watch the video from this point before you follow the summary of the process below.
Plug-in Project
The first step is to create a Plug-in Project for the custom model following the instruction from this How-to: Developing Plug-Ins - IModelFactory.
'M' Classes
Create two 'M' classes to hold the business logic for each of the two tables:
Right-click org.evenos.model > New > Class > Name: MEVEMain > Finish
Add two constructors and a generated serial version ID:
package org.evenos.model;

import java.sql.ResultSet;
import java.util.Properties;

public class MEVEMain extends X_EVE_Main{

	/**
	 *
	 */
	private static final long serialVersionUID = -4652910060540398746L;

	public MEVEMain(Properties ctx, ResultSet rs, String trxName) {
		super(ctx, rs, trxName);
		// TODO Auto-generated constructor stub
	}

	public MEVEMain(Properties ctx, int EVE_Main_ID, String trxName) {
		super(ctx, EVE_Main_ID, trxName);
		// TODO Auto-generated constructor stub
	}
}
Repeat for MEVESub:
package org.evenos.model;

import java.sql.ResultSet;
import java.util.Properties;

public class MEVESub extends X_EVE_Sub{

	/**
	 *
	 */
	private static final long serialVersionUID = -2076611601274220946L;

	public MEVESub(Properties ctx, int EVE_Sub_ID, String trxName) {
		super(ctx, EVE_Sub_ID, trxName);
		// TODO Auto-generated constructor stub
	}

	public MEVESub(Properties ctx, ResultSet rs, String trxName) {
		super(ctx, rs, trxName);
		// TODO Auto-generated constructor stub
	}
}
To get some idea of what business logic is possible in these classes, look at the 'M' classes in the package 'org.compiere.model' in the project 'org.adempiere.base' which is the core of iDempiere.
The video includes a useful discussion on building business logic into the 'M' Classes at this point.
Close-out
The plug-in is now complete, so you can build the product and deploy it for use.

